Interdependencies
I can only speak to my experience but when I started building I was a bit overwhelmed with everything. I chose to remain hyper focused on the task at hand, aiming to build the empennage with above average workmanship. I would say I successfully met that goal and with the months leading to my QB kit deliveries was able to spend a considerable amount of time researching and understanding what the rest of the build will entail.
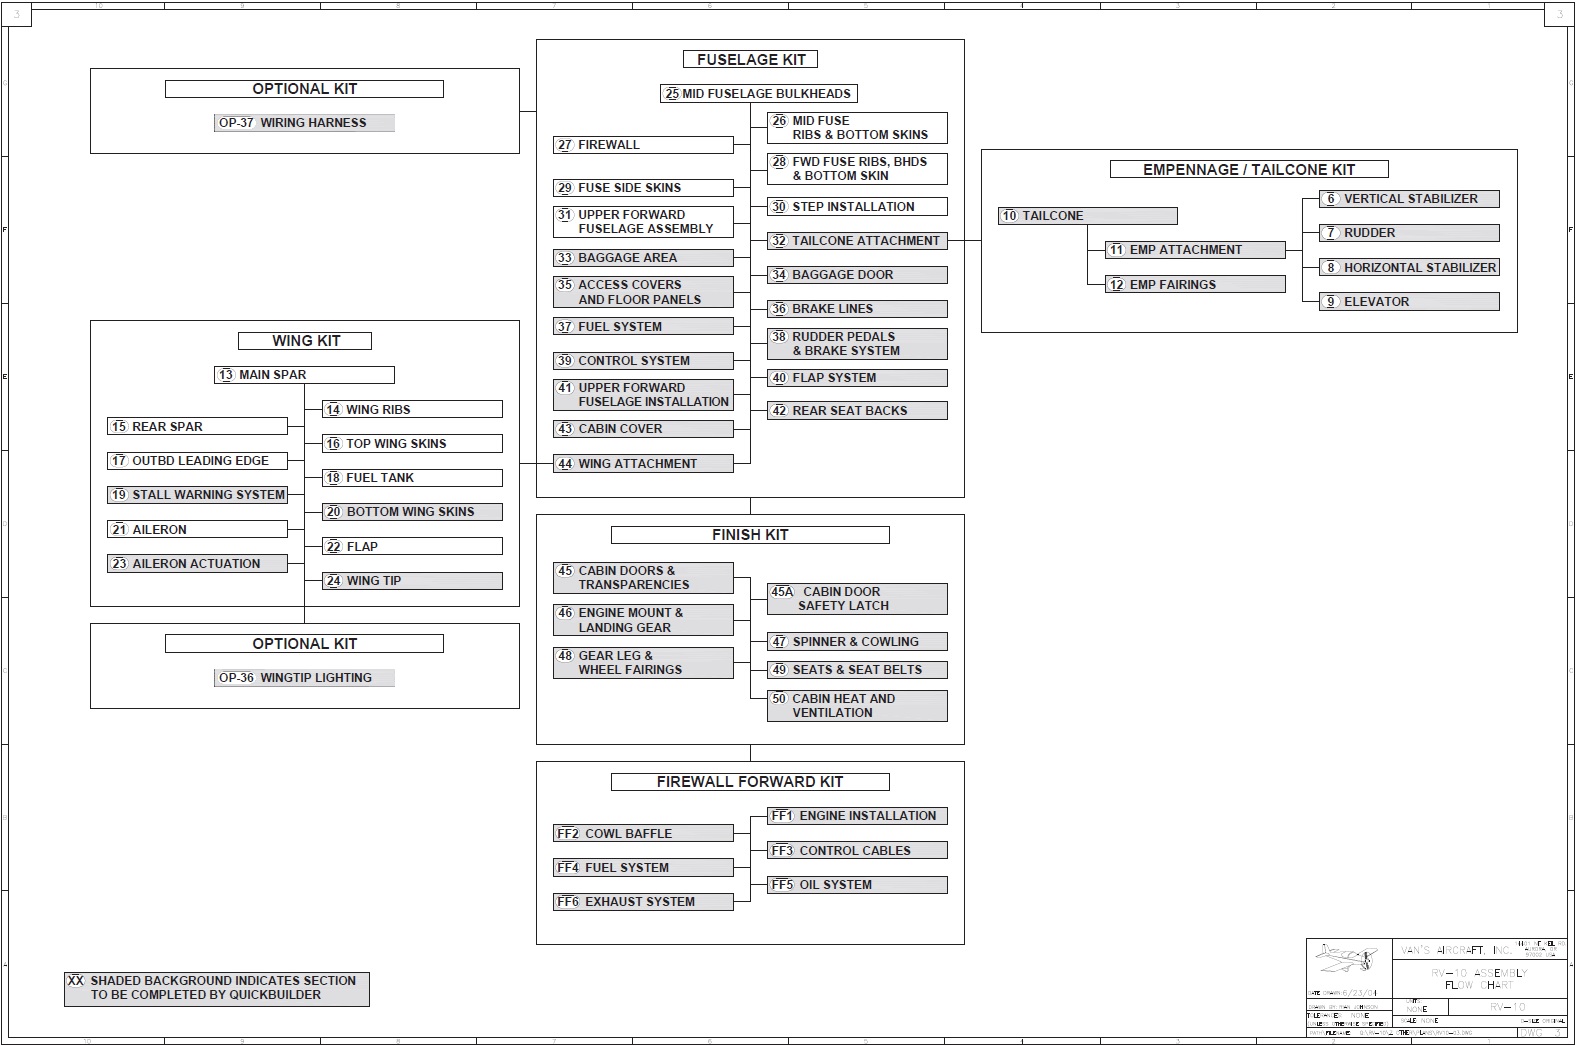
Vans provides a handy flowchart which breaks down the plans for each kit needed to complete the majority of the aircraft, showing how the kits tie in with each other. The choices you have in terms of interior, avionics, engine, prop, ect... aren't outlined in the flowchart but as you're going through this you will have an idea of what you want and when to install them. The plans don't have to be completed in sequential order but there are true dependencies as well as steps you can do concurrently with others. For example on the empennage you can in theory build all the control surfaces at once, only needing them completed for Step 11 - Emp Attachment.
Now unless you're running a team of builders or have done this before I would advice against started several sections at once, from experience working on multiple sections gets a bit overwhelming. Other steps you can partially do and still call it 'complete', but you really mean 'complete for now' such as the empennage because there are a few steps you won't finish until near the end with final riveting of the top skins, or the attachment of the fairing trim. Just make a note of it and deal with it when you need to.
 |
| RV-10 Flowchart |
In reference to my build this chart shows which sections are completed for you with a quickbuild. The short story is the QB Wings and Fuselage have a majority of the structural pieces complete but there are still plenty of steps you will be responsible for and you'll have to inspect for both quality and completeness.
Kit Inspections
I think of the QB kits similarly to if I was buying someone's already started project... hope they did a great job but need to verify it for completeness and quality. The most logical method for me was to start on Step 13 of the wings and walk through each section and each step and make notes of things not completed or of questionable quality. There were some steps that required two people to maneuver the pieces (Removing the tanks) but I went through each step and made a laundry list of items I needed to give attention to later. Here's what I found:
Wings
·
13-3 step 9 - Enlarge hole and Bushing (If needed)
·
13-4 step 6 - Tap tiedowns, 3/8x16
·
13-5 step 1 - 1/4 inch hole on brackets
·
15-4 step 4 - Drill out extra rivet
·
16-2 step 3 - Match drill #19 & #8
·
16-3 step 2 - Install Nutplates
·
17-3 step 12 - Fill stall slot holes (Maybe)
·
17-3 step 12 - Pitot tube rivet removed, unless AoA covers
·
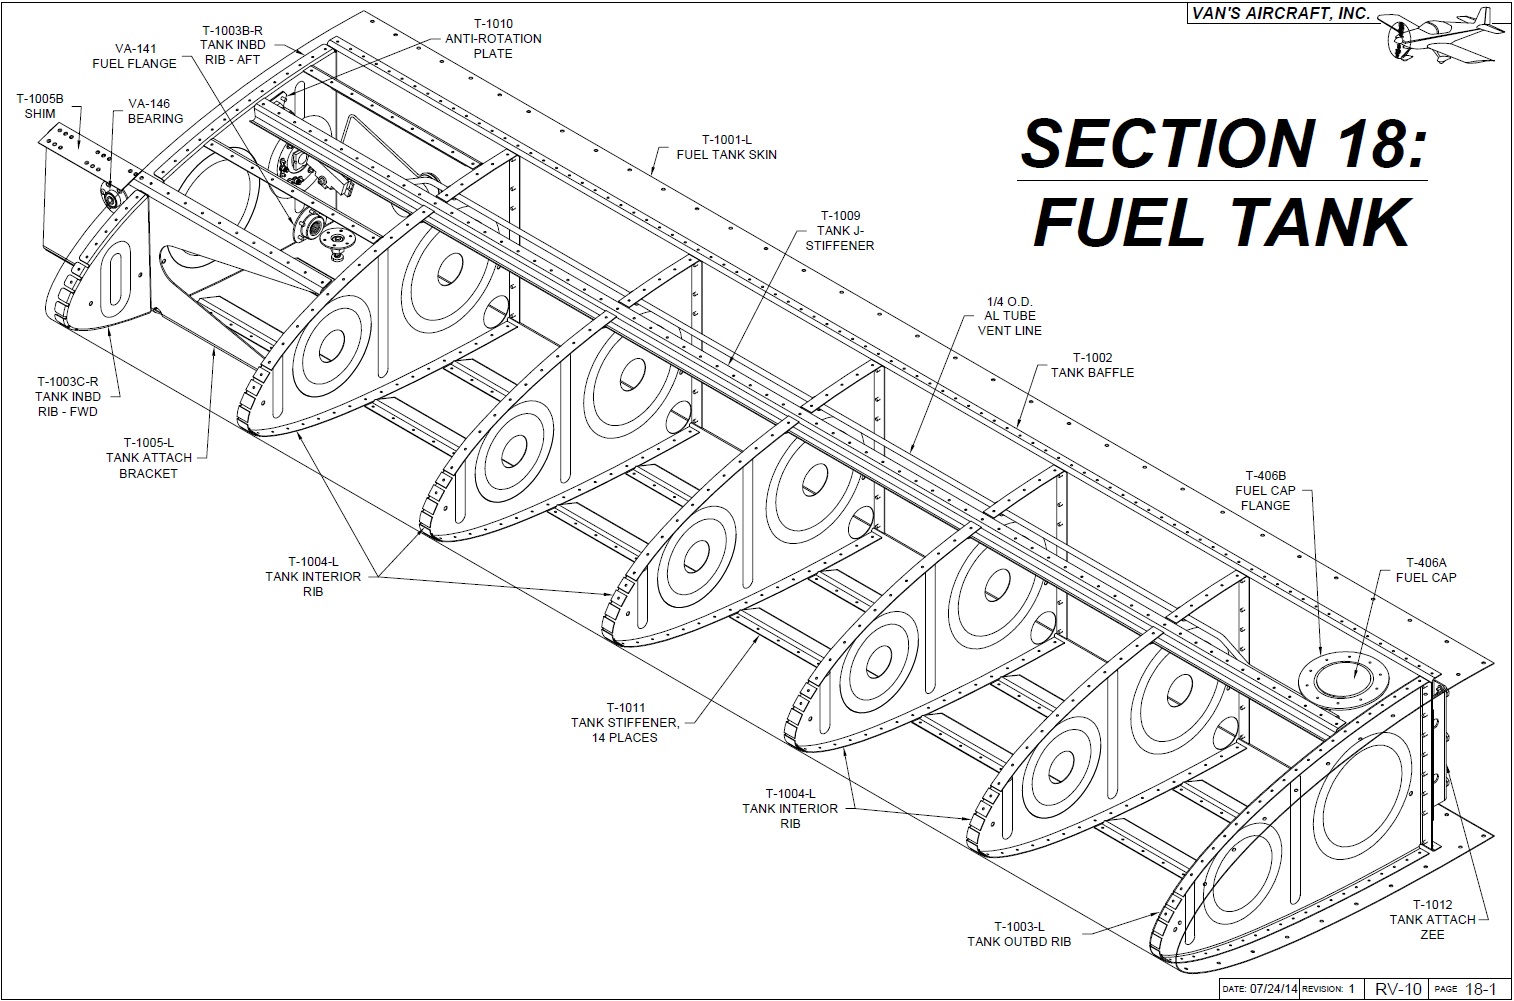
18- 5 step 5 – Attach VA-146 Bearing
·
18-7 steps 1-3 – Fuel Sender installation
·
18-8 step 6 – Reattach Tanks to wing leading edge
·
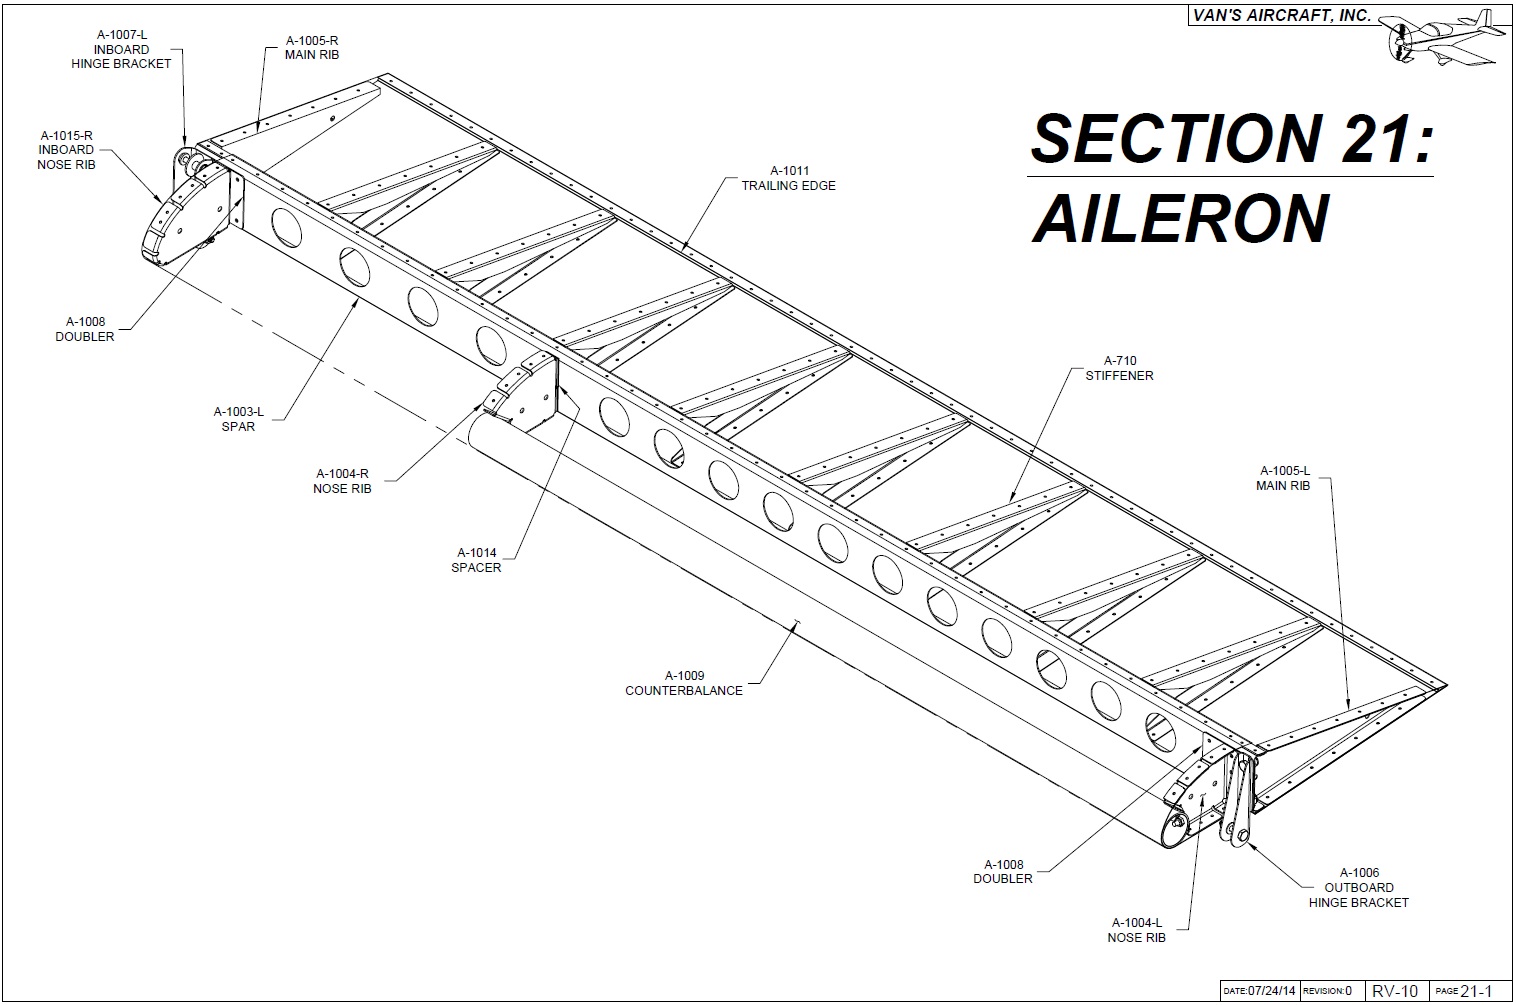
21-10 step 1-2 - Aileron Attach
·
22-5 step 3 - Install attach hardware
·
22-8 step 13-14 - install flap
Quick Build Fuselage
·
27-2 step 3 – Enlarge Lycoming Engine holes to 5/8
·
27-6 step 3 –Install two snap bushings for rudder pedals
·
27-6 steps 5-6 – Cabin heat install
·
28-10 step 12 – Nutplates and Rivets for FloScan or FT install
·
28-12 step 2 – Rivet Firewall assembly to Floorskins
·
29-5 step 4 – F-1006B cleco skins
·
29-8 step 13 – Baggage door Shims
·
29-16 step 3 – Remove Baggage door, hatched area
·
29-16 step 4 – Enlarge wing wire runs and install bushings both sides
·
29-16 step 9 – Rivet baggage door shims
·
29-19 step 8 – Vent door hardware install
·
29-20 step 1 – Rivet floor pans
·
30-2 steps 2-3 – Debur and install steps
·
30-3 steps 1-6 – Angle steps
·
30-4 steps 1-2 – mount and bolt steps
In the end if you didn't find any issues then I would recheck it again because you missed something. There are built by hand so even in that setting there's bound to be some missed things, I'm sure Vans could up their quality control system but that would greatly affect the price, so it's still an unbelievable time saver. It took me a total of 11 hours to inspect everything and as a bonus I'm now fairly familiar with how everything went together. Sure it won't be as intimate as if you spend 100's of hours shooting rivets, but you know enough about the construction to make you comfortable with the build.
 |
| Post Inspection |
RV-10 Quickbuild Sections
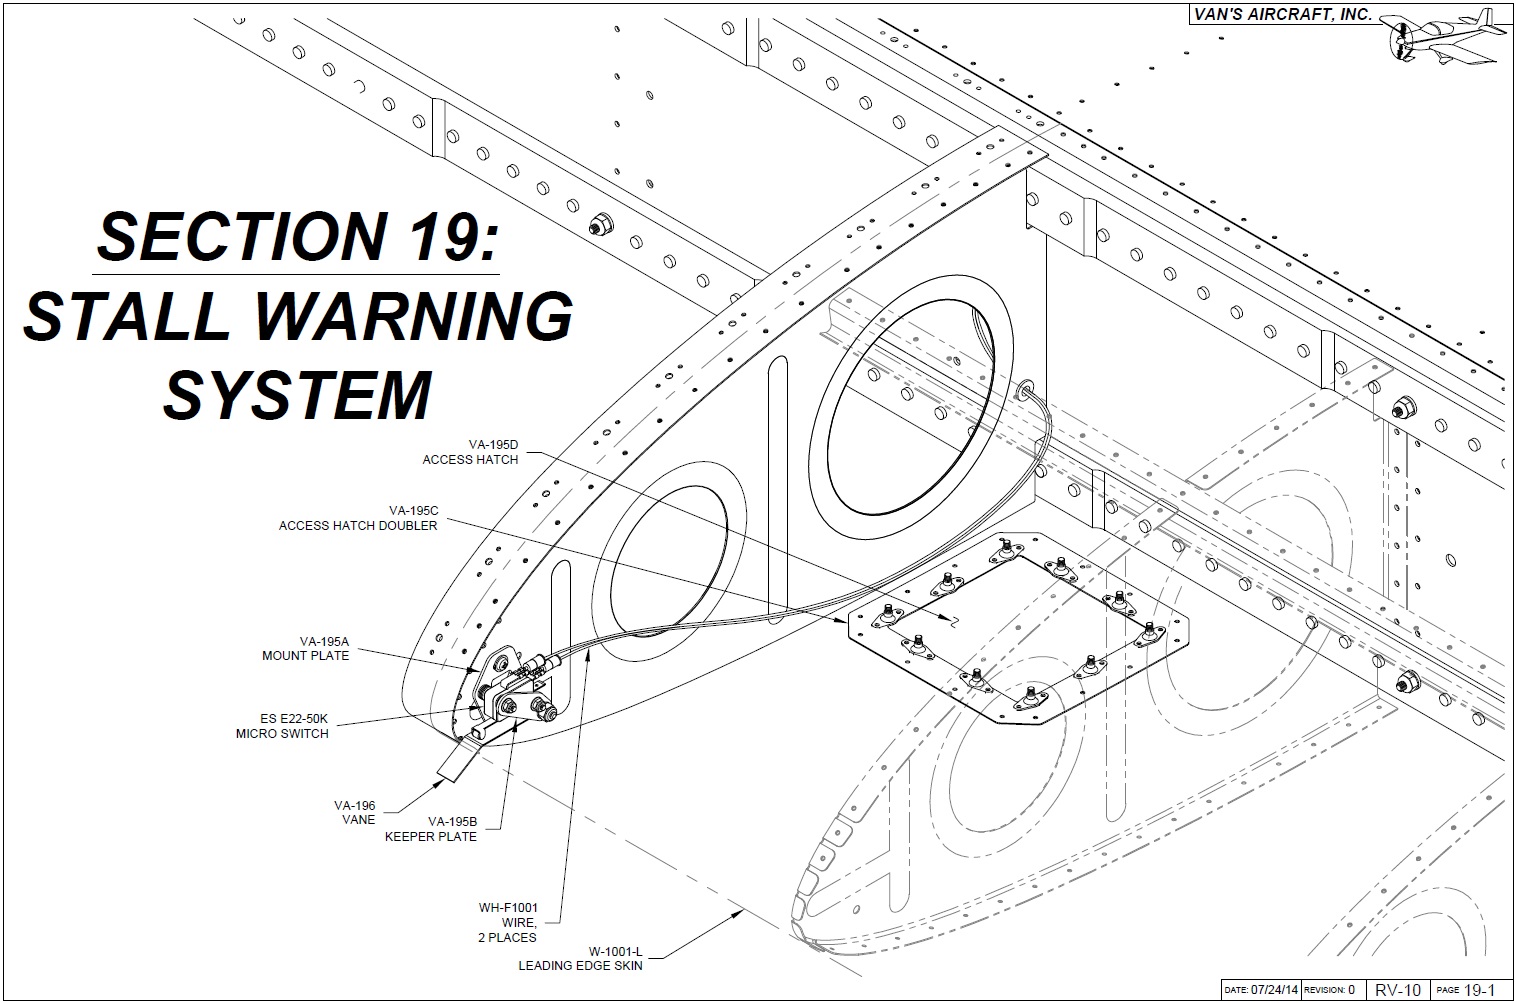
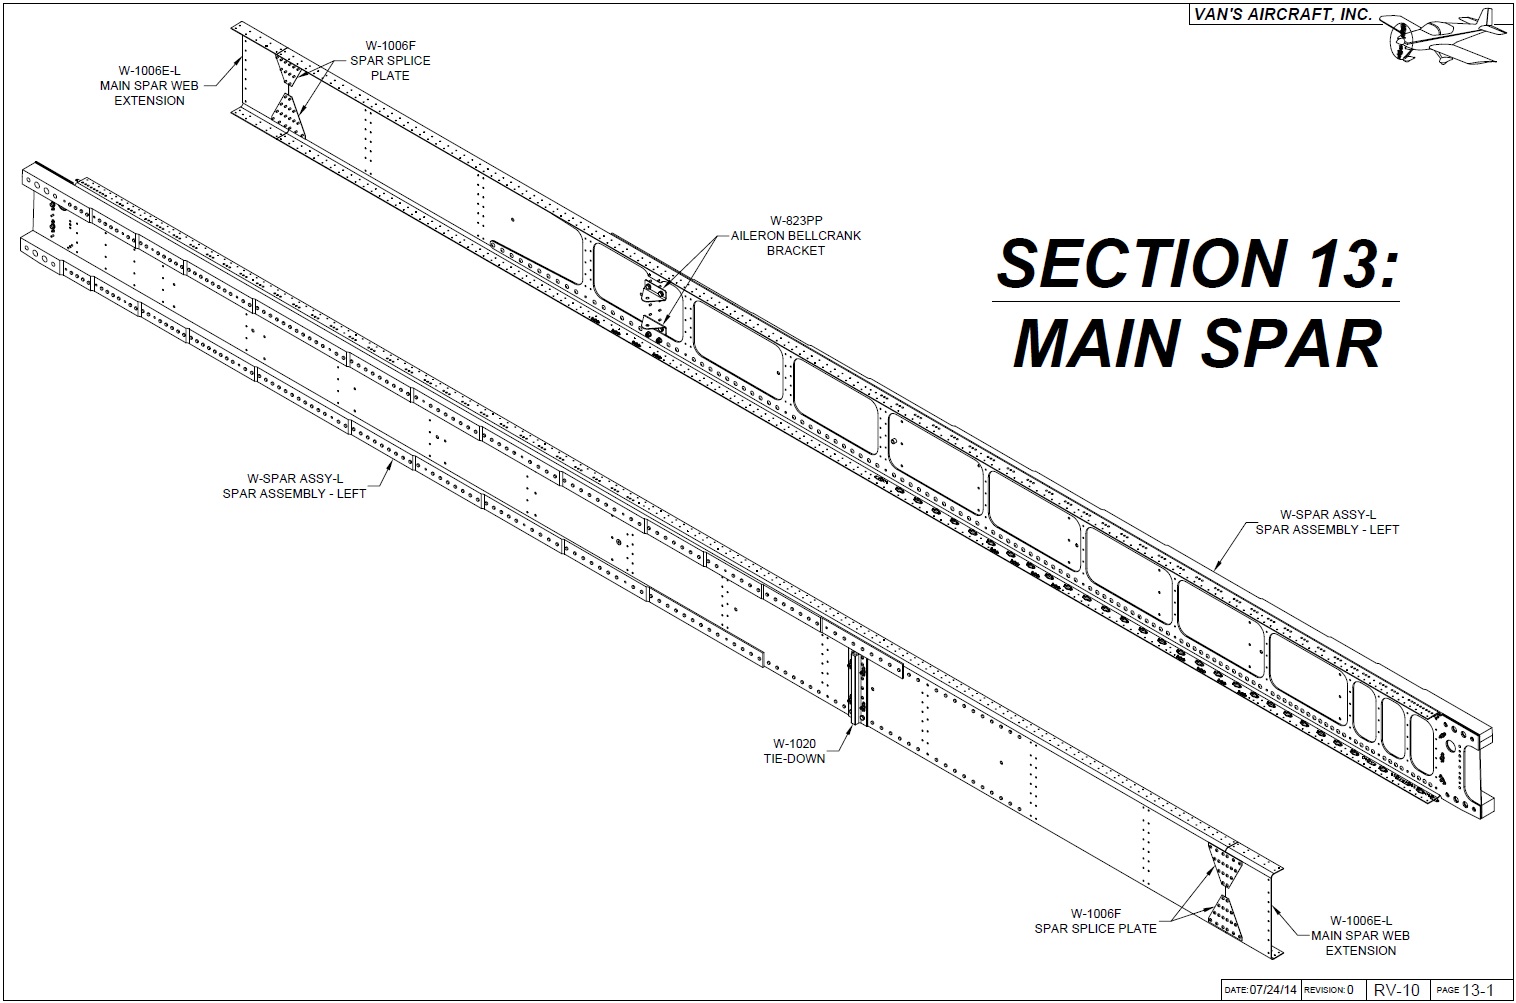
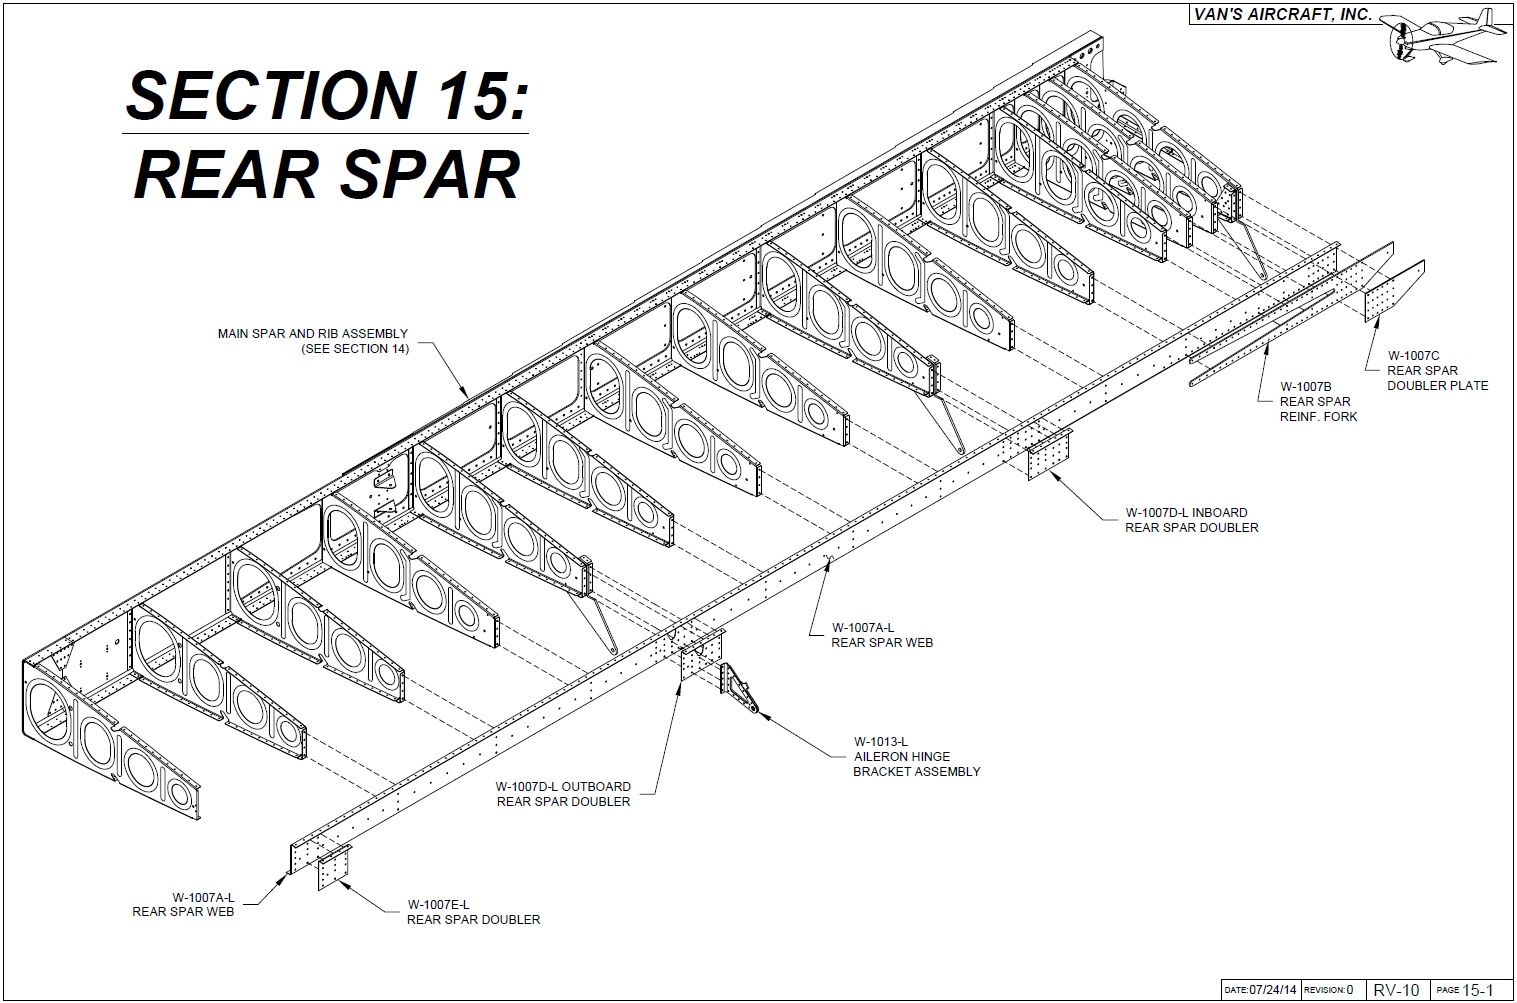
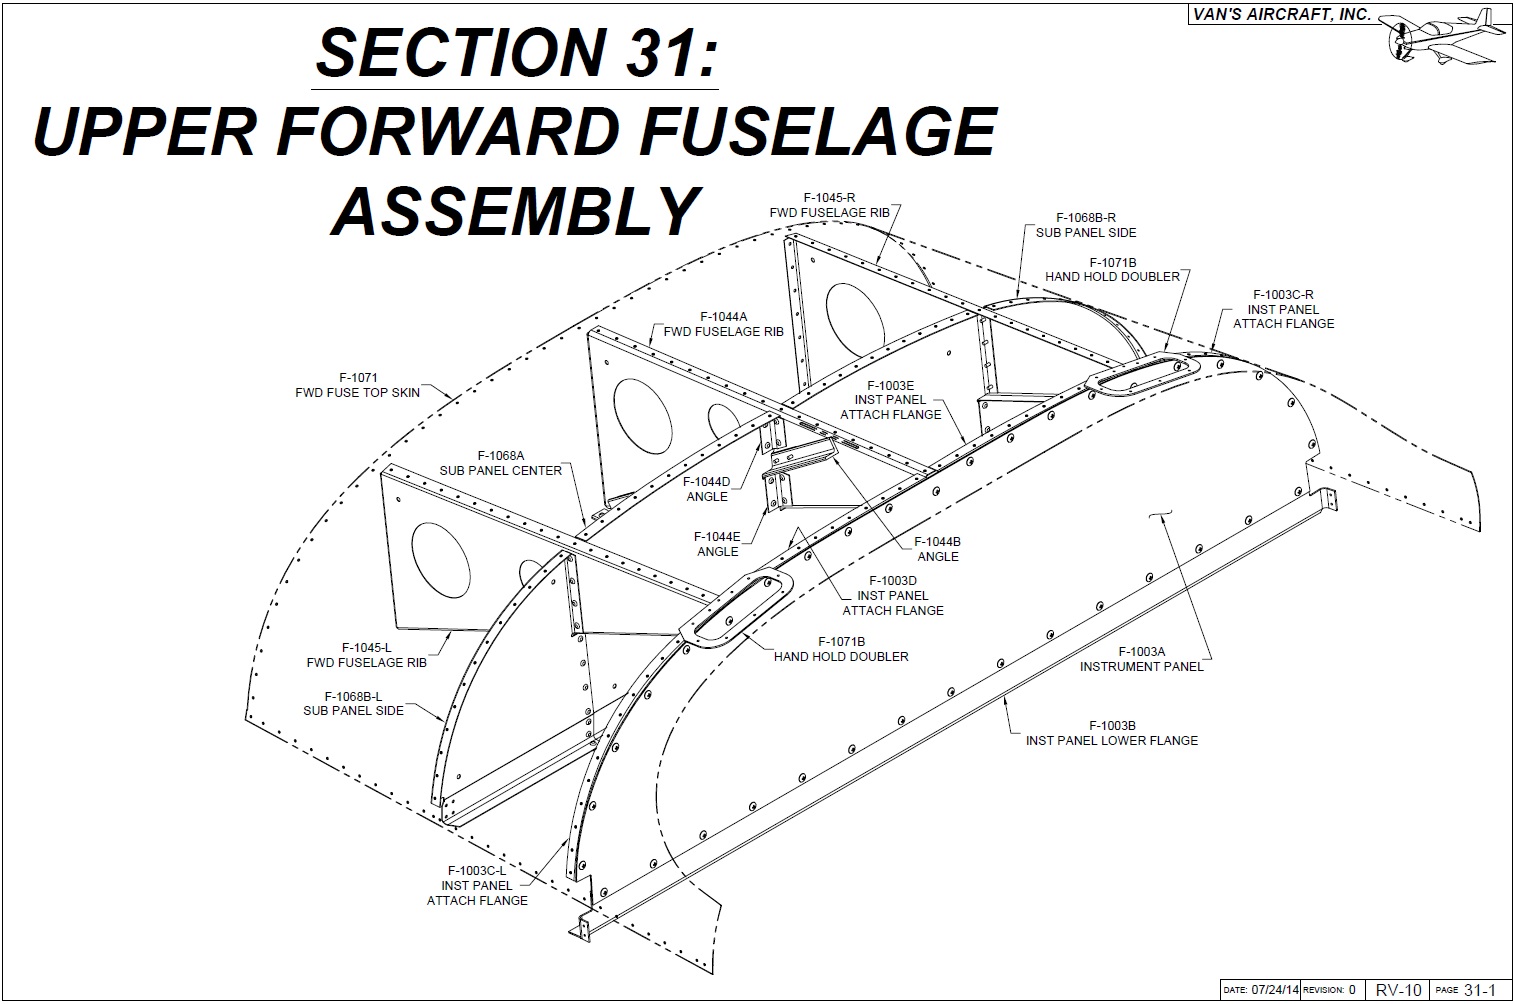
For continuity I wanted to provide all the section drawings for the inspected assemblies. Based on my inspection I'll have to revist most these sections before I would call them 'complete'.
Wings
 |
| Section 13 |
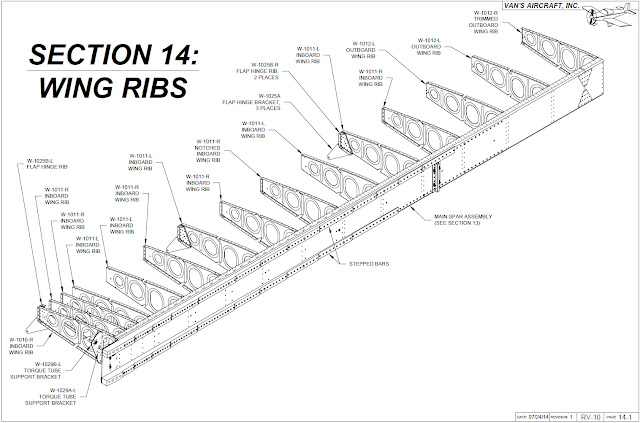 |
| Section 14 |
 |
| Section 15 |
 |
| Section 16 |
 |
| Section 17 |
 |
| Section 18 |
 |
| Section 21 |
 |
| Section 22 |
Fuselage
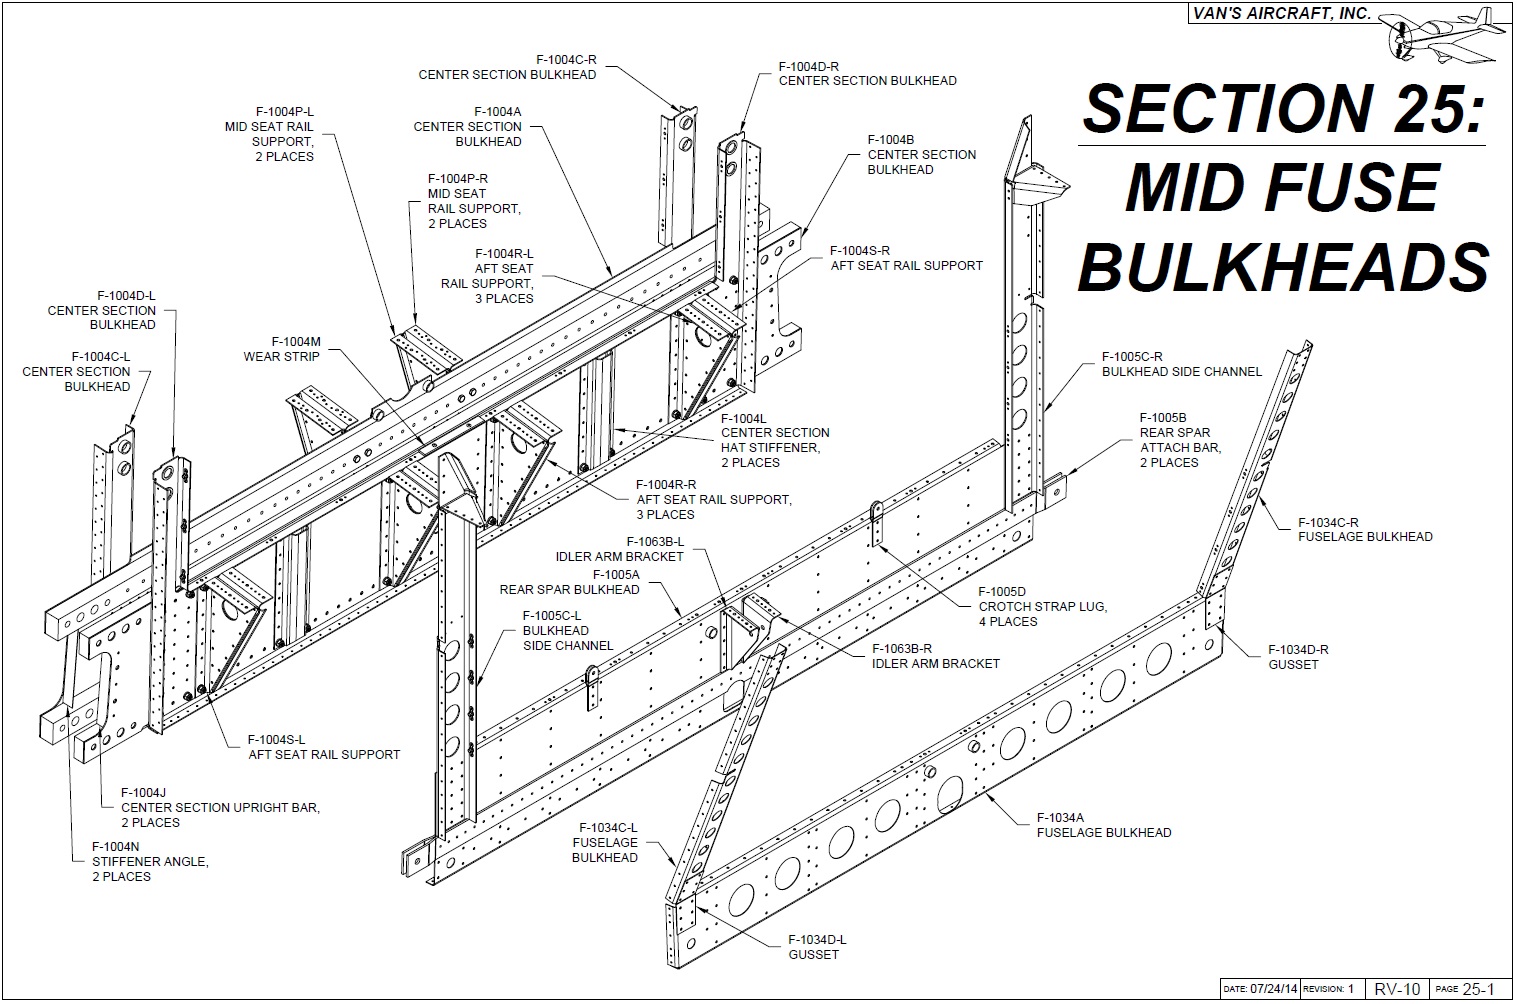
 |
| Section 25 |
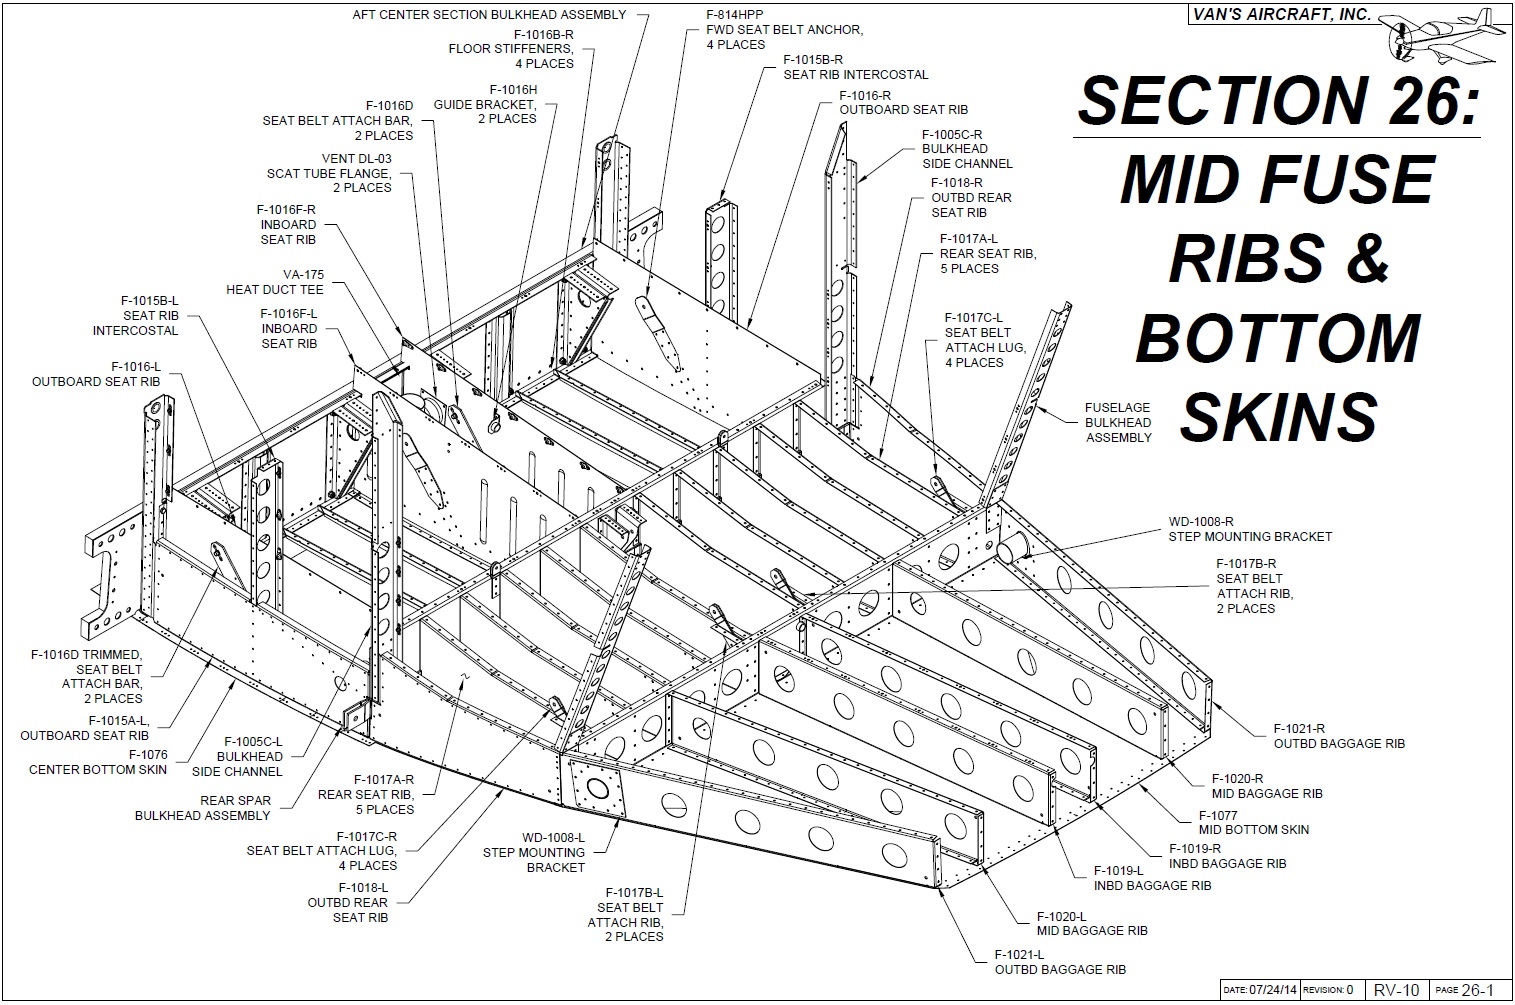
 |
| Section 26 |
 |
| Section 27 |
 |
| Section 28 |
 |
| Section 29 |
 |
| Section 30 |
 |
| Section 31 |