Wednesday, November 25, 2015

Tailcone Started & Interior Paint Test

Tailcone

Section 10
Before starting on the tailcone build I wanted to clean up the work space a bit.  Mainly I wanted to utilize those above garage shelves to store all the completed pieces until I'm ready to mount them. I was able to get the stabs and control surfaces neatly put away .


Onto the tailcone... well the first step requires you to take a bracket and tap it for a 3/8th machine thread... problem is I don't have a tap set, my neighbor doesn't have a tap set and a buddy of mine has one but not sure he has one that large.  So I got online to fine one and it in my search I found that I could spend $25 for a quality tap and handle or I could pay $8 and just order the part already threaded from Cleavelandtool. Since I'm doing the Quick Build wings I only need one of these tie-downs but I did go ahead and get 3 powder coated tie down rings from them as well.


The next several pages of the plans deal with shaping some pieces and starting to form up the substructure parts.  I had some foul ups on match drilling some parts.  Was able to just make another piece and move on.  When dealing with the Jchannel material you'll have some excess that allows you to do this so if you mess up on it go ahead and cut another piece from the end of one of the shorter pieces.


I set the above pieces aside and then got working on the ribs and jchannel pieces.  The ribs require a substantial amount of deburring.  I also went ahead and put some flutes in just to help keep the pieces flat.  After that just position and match drill the pieces... interesting note is apparently there were some steps removed because on one of these the plans jump straight to Step 3.


The Jchannel pieces are fairly time consuming.  Each piece has to be cut to length, have each end cut on a 45, deburred and then a series of lines drawn on the back side for positioning later.

12 pieces overall, some are stacked.

Interior Paint Test

Another note of endless debate is what to do with the interior of the plane.  You can keep it aluminum, use one of the many primer choices available or in my case you a shake can(s) of Rust-Oleum all over the place. You might be able to source the paint local but I didn't have any luck.  Prior to committing to a case (6 cans) from one of the big box retailers I wanted to get a single can to test it out.

This came as a suggestion from a plane builder who did similar on his RV-8.  An RV-8 is going to have a lot more metal showing than an RV-10 but I wanted some consistent coloring just for aesthetics. On top of that using a shakey can of spray paint makes for easier touch-ups as things get scratched or you make changes down the line.

One of my mistake pieces had already been primed before I discovered my issue so I used that as a test piece.  Did multiple coats from 1 - 4 light coats along the piece and settled at 3 light coats being the best.  Any less and the primer comes through, any more and it's not noticeable. 

Happy with the color
I'm going to give this a week or two of cure time and then abuse it to see how it deals with scratching, twisting, etc.  If all works out I'll order a few cases and my plan is to paint the entire interior of the tailcone and the fuselage pieces down the line.

Sunday, November 15, 2015

Trim Tab done, Elevators Complete

Trim Tab

The trim tab is a bit deceiving.  It consists of 5 aluminum pieces and 3 foam ribs each.  This was something I thought would take a few hours, maybe 5 at the most when including priming.  That was not the case, took close to 15+ hours when all was said and done. Some of the additional time sink items are making a couple wood forms to help hold the pieces together. Also, the home made metal brake that I mentioned before.


The first part really just deals with taping out the area to sand on the inside of the skins to ensure proper rib adhesion.  Then you get to use the brake to bend the skin more and then it's the typical deburring and cleco'ing routine. While a bit time consuming and at first somewhat confusing, there's really only one way to get it put together.

Still thinking this was going to be fairly quick I got to the point where you need to bend the side taps of the skin.  I tried following the directions in the plan and after struggling for close to an hour I seriously botched up one of the skins.  It looked as if I had just hammered it randomly with the rivet gun going for some type of aged look.  I picked up more phone right away and ordered a replacement... another $20 lesson learned.

I did some research on the boards and seemed there were some others that had issues with this step.  Some made some jigs, others reverted to the same method used on the elevators.  I decided that's what I would do but first I went to my neighbor's house now referred to as 'Hood' Depot, to score some hard wood scrap.  I took 3 oak pressed 1/4 boards and glued them together overnight.  Then I cut a bit of an angle on them, cleaned them up and used these as the backing for the bend.

Took me a while to do the first bend but once I got the placement and the method down I was able to complete all of them quite easily.  I started with a piece of wood to get the bend going, then finished up with the rivet gun on a very very very low speed.  This helped just secure the bend and not give it that aged hammer look.  I put each in the brake and weighted it down for about 12 hours just to help keep the bend in place.  Probably didn't do anything but I was done for the night and knew I wouldn't get to working on it for another day or so.


This trim tab contains some metal bracket pieces you have to cut a bit off before you can use.  Curious again why theses come like this, are they from another kit? Anyhow I've developed a certain level of skill at using the bandsaw and grinder to get the proper form.  After I completed them did the test fitting to the skin.  Then you match drill everything up and go through the dimpling process. All the pieces looked great.
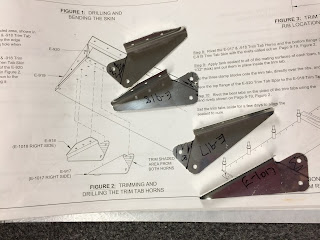
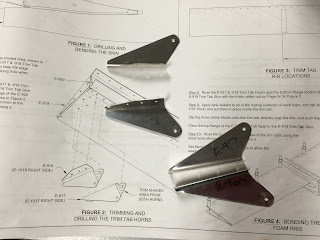
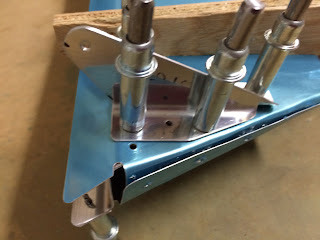

On to priming, Prekote the pieces over lunch allowing me to set them out to air dry for about 5 hours.  After work I got right outside, mixed the primer and did my spraying, coming inside between coats so I didn't feel rushed to keep spraying.  Priming at a minimum takes about 2 hours no matter how small the batch is.  A lot of that is just waiting for the priming to 'pot' for 30 mins or the 10 mins between coats.  I do about 2 coats per side, then check for any missed spaces usually requiring another 2 coats on those spots.  So all in all that's about an hour of spraying... then you have the Precoat process on the front end and cleaning on the back end... so about 2 hours.
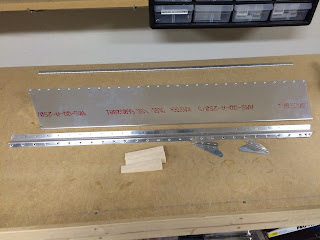
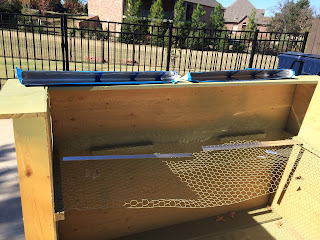
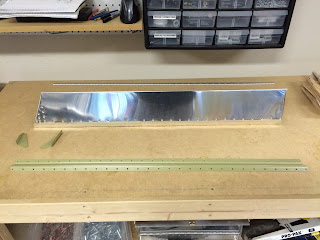

After letting the primer dry for about a day it's time to start getting these parts put back together. You're able to rivet the horns and the spar piece to the skins but only the bottom rivets. You also rivet the side tabs, the instructions were a bit confusing on this in that I didn't know if those holes should be dimpled or not.  It talks about dimpling all the #40 holes which I did before I primed but didn't dimple the tabs because they are #30... Second guessing this I looked at some other builder logs and pictures and some looks dimpled but I couldn't tell.  Decided it only made sense to do the same as the elevator tabs and go ahead and dimple these.  

You end up with a bit of a sandwich piece where you can test fit the ribs before you secure them in place.  To secure them you use the same sealant mixture you used on the elevator ribs.  It can be very messy but using gloves and being careful you can do it without too getting it all over the place.


After that you cleco the top skin on and use the wood forms you made to secure everything in place. Then place it on a shelve for the 3-4 day curing time.


After over 3 days I decided to go out and do some work, my intent being to only put about an hour in.  This hour turned into longer and I was able to finish the trim tab.

Nothing mind blowing here, just worked through the last page of the plans starting with splitting a long hinge piece into two pieces and then cutting those down to size.  Then you need to drill some #40 holes in the ends which will be used to help line the piece up for match drilling.  After securing that piece to the elevator you get it positioned and drill the other end.... then the middle... then work your way from the middle out to the ends, match drilling and cleco'ing as you go along.


You do the same thing with each trim tab.  I didn't take any pictures apparently, but the process is the same.  Cleco it to the starting hole, position it to drill and cleco on the other end... then one in the middle and work your way down.  Then you mark the outboard ends because you'll need to trim them.

You literally pull the hinge pins out separating the trim tab from the elevator but keeping the hinge piece on.  I took these hinge pins and put them in the freezer... why you ask?  Well the idea is by getting the pin cold it will shrink just enough to make reinsertion easier.  I've done this with bolts and what not, so I assumed it would work for this.

With the pieces separated I worked one piece at a time but removing the hinge.  I then cut the hinge to size, deburred each piece from my match drilling, ran a scotch bright underneath both the elevator hinge and trim hinge placement area.  Sprayed each piece with the air hose to ensure no metal was loose anywhere and got to riveting.  I was able to use the pneumatic squeezer for all these rivets.  I found the best way to do it was to cleco every other hole, start in the middle by riveting a single rivet.  Then working outboard take a cleco out, secure two rivets, rinse, repeat until each piece is done. 
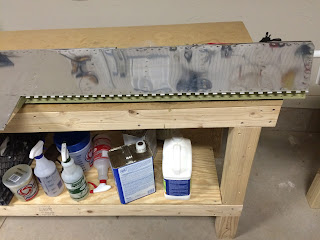

Once all the hinges were riveted together I took a frozen pin out and was able to attach both pieces fairly easily.  I just used my hands to push it about 80%, then used a hammer to tap the end until I had about 1/8 of an inch coming out on the inboard side.  The final part is drilling a small 1/16" hole and bending the remaining hinge pin in the below manner and safety wire to the hole.  I'll do this later, I've safety wired several things but not sure if aviation safety wiring is different so will do some research and then go do it at some point.


Elevators Complete

Looks more like a horizontal stab with the trim tabs connected.  On to the Tail Cone....


Wednesday, November 11, 2015

Registration Number & Paint Scheme

Registration Number

I put down the $10 and reserved the registration number '405JW'.  405 is the OKC area code and JW are my initials... pretty straight forward.  It wasn't my first choice but unfortunately my first set of choices are in use so pending any purging of the N-number database in the next few years I will be sticking with this.

A lot of aircraft owners personalize their registration number to be something meaningful.  I'm less on the meaningful and more for the easy to say and most importantly easy to be understood. "November Four Zero Five Juliet Whiskey" or "Five Juliet Whiskey" are easy enough to say.  Fun thing is you can change it later if you decide you don't like it and don't mind repainting your plane.

Paint Scheme V1

Speaking of paint schemes, I made some progress visualizing what I would like. You can really do anything you want when it comes to paint. I started asking some very basic questions on the Vans board which led me to this fantastic Webinar Video. It's basically an hour and a half video talking about the various paint concepts from a guy who's been designing schemes for almost 20 years.  It really helped me break down the different components to a scheme and start narrowing down some ideas.  On top of that I spent a good amount of time on http://www.airliners.net/ looking at other RV pictures which helped refined what I was looking for.

As usual I wanted to incorporate some technology into this process.  I'm fairly tech savvy so I downloaded some CAD drawings opened them up in a borrowed copy of Adobe Illustrator. Bit of a learning curve with this software as it's designed for professionals.  But after awhile, and I learned how to add lines and then use the paint function to fill with color.  End result is this-


Nothing is to scale but visually gives me an idea of what I'm looking for.  Over the next few years I'll refine this and add a top and front view to give a full picture.  Great thing about doing it on a computer is you can change the colors as many times as you want just by clicking some buttons.

UPDATE:  By the end of the project both the registration number and paint scheme had changed several times.


Thursday, November 5, 2015

Elevators "Mostly" Complete & Rudder Revist

Elevators

I was concerned on my hours vs. other builder logs.  It seemed I was almost done with the elevator in about half the time some other logs had accounted for.  The conclusion I came up with was either I'm a prodigy plane builder... or I was doing something wrong.    Well I'm happy to say neither was the case, although it would be nice to be a natural at building aircraft.  Really what it came down to is I completely underestimated that time it would take to complete the additional tasks.  Mentally you think you're going to fly through things, but then you spend hours and hours rolling the leading edge or riveting the trailing edge.  There's also a period where you use sealant and you have to wait days before you can continue.  Now I do multitask, and I used that period to work on the trim tab, but then botched up folding the edge and had to order another skin... will type about that later.

Following where I left off, I fabricated... ie cut out the ribs using the provided foam material.  Using some spray adhesive that luckily my neighbor had I was able to knock this out in about an hour... this is an example of something I thought would take 5 mins.  After cutting them out I test fit everything together to make sure there wasn't an issue.  I might have had the measurements of the interior placement a little off because I'm guessing they were supposed to line up between rivet ends and that wasn't the case with mine. Gently forcing them back allowed the rivet to put an indention in the end of it, can't see that posing an issue with it in the future so just went with it. After that cleco'd it up to make sure no issues before I started mixing the sealant.


 I'm using little 1 oz sealant kits for both these ribs and the trim tab ribs. I figured that would be less messy in the long run and since I was going to use the 3M tape for the trailing edge I really didn't need that much.  It is messy, but with gloves it's manageable and I was able to apply a thin layer to the top, bottom and back of the rib pieces and place them in.  Added the tape to the trailing edge and cleco'd everything in place.


While waiting for that to dry I decided to do a few things to my garage.  One was to make the homemade brake that will be used to bend the trim tab skins.  I just used two 3' pieces of poplar and 4 hinges.  Left a small gap on the hinge side, not sure if that's a good or bad thing.  Saw a few examples where they were sandwiched together, and others where there was a gap.


Next, I took an angle iron that I had, rounded a few of the edges, countersunk some holes and screwed it to the bench.  This is completely removable but can be used as either a straight angle or as a long back-plate for riveting the trailing edges of the elevators.


Lastly, I reorganized my tools and made a small shelf.  I really didn't like storing my pneumatic tools on my movable bench so decided to hang them.  Likewise, I decided to hang my 3 10' hoses so they wouldn't just be a tangled mess under the workbench.  I also found I kept using the right bench corner as a shelving system so decided to correct that making a small 8" deep 40" wide MDF shelf that I can throw things on instead.


Finally, after the mandatory 3 days of curing was up I was ready to get to riveting the trailing edge.  I used the same method I had used on the rudder.  It's basically-
  1. Place rivets in hole, secure with tape.
  2. Flip piece over and back rivet 1 middlish rivet about halfway and then move out 7-8 rivets a repeat.
  3. Go back through and halfway back-rivet the rest of the rivets (This apparently secures the rivets and keeps the edge straight.
  4. Flip piece and using a mushroom head rivet each rivet the rest of the way down.  I moved from the middle to the edges.
  5. Check to make sure edge is straight...


This is actually straight, not sure my camera is...
At some point this week I had a few minutes to spar so used that time to cherry rivet the cover plates.  Fairly simple step and one which literally took 5 mins.


Then came the time to roll the leading edges.  Just like the rudder this was a huge pain and my hands still hurt from doing it.  This was a multi-day process not only because the time it took but the amount of times I came in to google how other people had done it.  I rolled the edges using a tool that I had bought.  It's not the easiest tool to use but there's a good tutorial on how to use it.

After forming the edges, I decided to go with the method of cleco'ing a PVC pipe to the edge piece and roll it in.  I used a 1 1/2 because I previously used a 1 1/4 and didn't like the results.  That said I didn't particularly like the results of the 1 1/2 either.  I spent a good bit of time using the hand seamer testing different angles and continually working the edge.


Even after all of this I cleco'd it together and noticed 'pillowing' between the rivets.  This was the same problem I had on the rudder and that was after spending a lot of time messing with that piece.  It seems to be a common problem that people have and the suggestion was either continue to work it until it was flat or add extra rivets...


Pillowing...
Luckily in my grand wisdom of working the rudder I knew this day would come.  The day that I would make the executive decision and add some extra rivets to correct this.  So I had already ordered an extra bag #1123, containing the additional rivets needed for this add on step.  Drilling the additional holes was easy;
  1. Mark the lateral line between the rivets.
  2. Mark a vertical line exactly in the middle of pre-punched rivets.
  3. Use a small bit 3/64 or so to predrill the hole.
  4. Use a 1/8 or #30 to right size the hole.
  5. Use a #30 reamer to clean the hole
  6. Use compressed air to clean out the hole and clear any bits of metal from between the pieces.
  7. Acetone as a final cleanup
  8. Rivet away!
The end result isn't perfect but is a lot cleaner looking and makes me feel better.


Time to put counter weights on.  I'm not sure why Vans couldn't make lead molds specific to this step  resulting in the shapes required. That said, the instructions are simple enough but cutting lead on a band saw is not fun.   What's equally not fun is trying to cut the ridge off of two pieces and then trying to grind them somewhat flat.  It puts little pieces of melted lead all over the place which you get to clean up later.  Used a scale to make sure like parts were somewhat the same weight...

I did get to break out my new book and use my micrometer on this step.  The book has the measurements for all standard bolts and whatnot so I used that in conjunction with the micrometer to find the right bolts.  The washers and nuts were easy since they were in a bag by themselves.  After that it was just a matter of getting everything attached.  Using a mallet helped to gently hammer everything in place and get the bolts all the way through.  Then it was a matter of attaching everything and torquing to the correct torque.  Currently using a $10 harbor freight special torque wrench which I need to replace with a higher quality tool.  For this purpose it works fine but when I get to some more specific items will need to not only double check these but ensure all nits, fasteners etc are within their proper tolerances.


Complete minus trim tabs

Rudder Revisit

Since my original work through of the rudder I have become adept at a few things.  One of which is deburring the skins, so I decided to get the rudder down and give it a once over to ensure all the skins were deburred as best as possible.  I then decided to go ahead and fix my previous rolled edge by adding the additional rivets as I did on the elevators.  Again a few area's I could improve, but overall much better looking. 


Next up, trim tabs....