
Landing/Taxi Lights
Before I get into the completion of section 24 lets talk a bit about Landing/Taxi lights and what FAR (Federal Aviation Regulations) is required. Well a taxi light is never required and per these regulations - "91.205 (c)(4) If the aircraft is operated for hire, one electric landing light." Given I don't plan to operate for hire then I guess I don't need either and I can move on.... Well if you've ever flown at night and had your $10 incandescent cowl mounted landing light burn out before landing then you know landing lights greatly improve the visibility of the runway. Likewise if you've ever been taxing at night and had someone pull off the runway with their landing lights directed at you know that it's blinding bright and down right inconsiderate, so taxi lights are a must for me as well.The choices are endless and over the last year or so I've looked into and at decided on a number of options, only to change my mind when I see something else. Here are some of my previous options and reasons why I didn't pick them.
- Vans Per Plan - To be honest it took about 5 mins to throw this option out. It's a cheap add on but not LED and apparently doesn't offer much light. LEDs are a must because as I mentioned before it's not fun to have bulbs burn out during a night flight. I also couldn't figure out if there was a taxi option either... bottom line there are some much better choices.
- Duckworks Aviation - They make a light that mounts into the leading edge of your wing, and then you can use the factory landing lights as taxi lights. I initially was going to go with this but then I decided I really didn't want to cut into my wings any more than I had to. Might not seem like a big deal to seasoned builders but freaks me out!
- Aveo Ziptips - These are a really impressive option consisting of complete wingtip replacement. They have all the bells and whistles: Nav/Landing/Taxi/Recognition and lasers! Okay they don't have lasers but they have everything else. I decided on these prior to my QB Wings shipping so I had the ability to remove the stock wing tips to save some money. The problem was I couldn't find the price of these much less where and how I could order them. I had some emails going back and forth between the CEO of Aveo and she was never really clear on how to get a set. Went through the usual channels and no one could get me an answer. I'm huge on customer service and when I can't even throw money at a company for a product I hate to think about having to work through issues later on if there is an issue with the product. In the end that was the reason I skipped on these.
- Aerosport Cowl & Baja Squadron Pros - There have been a number of people who did their own modifications and installed insanely bright (4,900 Lumens per light) Baja Squadron Pro off-road lights into their wingtips. Takes a bit of customization but it can be done with good success. I wanted to combine these with Aerosports cowl light using a wide angle lens to function as a taxi light. The end result would of been similar to the movie Poltergeist when the closet opens up.... I still very much like this idea but since I plan on using Rod Bowers RAM air system which already requires a modification to the lower cowl I wasn't 100% sure if these two would play nice to each other.
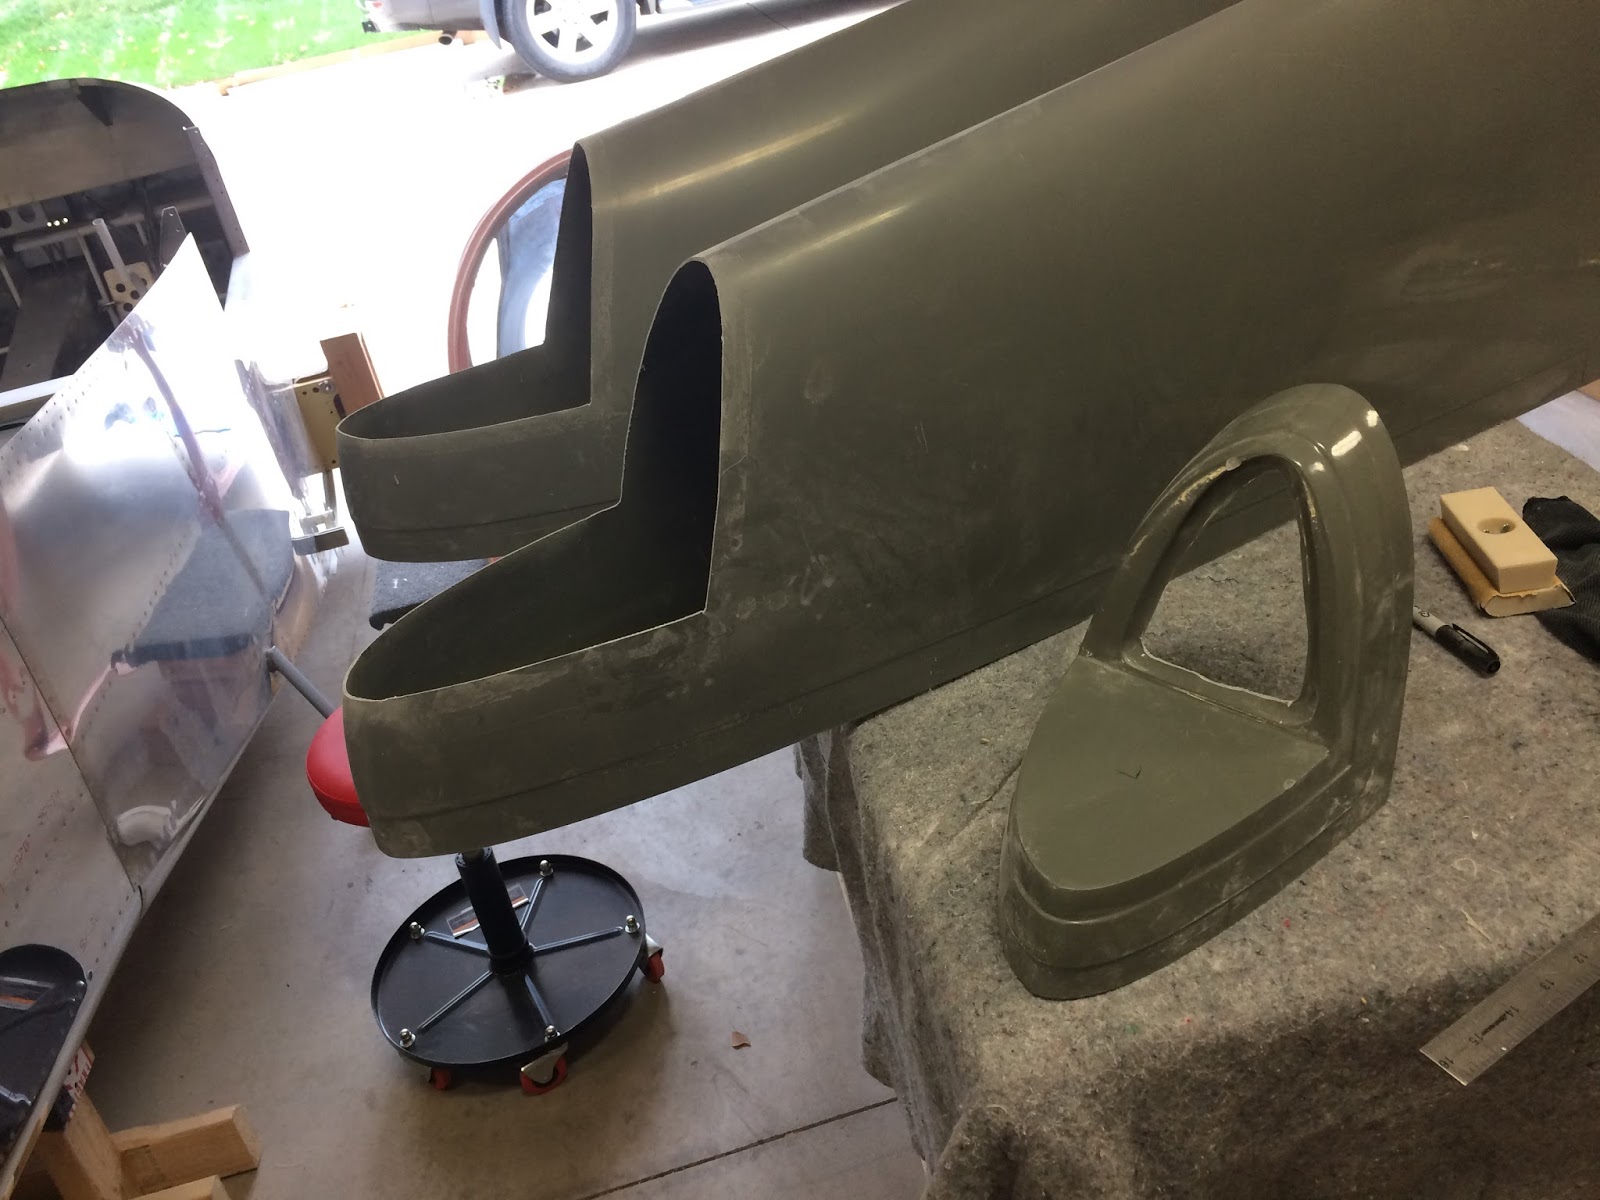
I had some time to kill during lunch one day so decided to dive into this modification and see what I had to do. The instructions are solid giving you some dimensions to measure out, tape off and finally mark the cut lines. After you done with this you just cut the sections out as your measured, you also rough cut the area on the replacement piece... not sure why you have to do this now but it does help later as your fitting them together. That all took an hour and had to get back to work but was a lot less painless than I had anticipated.
 |
| Stock Tips with replacement piece |


 |
| Roughed out |

 |
| Looked correct to me. |
To connect these I used a resin/milled fiber mix as glue around the entire flange and then cleco'd them back in place. I ran a bead of this around the inside flange as well and then laid a layer of fabric down. Using a straight resin mix and cloth I laid up two layers of cloth around the entire inside of the part. After that I put some peel and ply down... this probably isn't needed if you're really good with fiberglass but I'm not so the peel ply helps me ensure everything is pushed down and also wicks up some of the excess resin I inevitably put down. After that it's the cure for 24 hours game!

Nothing about working with fiberglass is a fast process. In addition to that I'm extremely inefficient at the process so makes for a lot of waiting time. You can get some epoxy hardeners that cure faster but for me I spend a lot of time messing with the stuff so I prefer it remain slow to set up. In general the process is the same as I used on the empennage pieces but just way more of it. On the Wing Tips I had used Micro filler to fill in the gaps, did what I thought was a great job of sanding and then rolled on some resin and let that cure. Used some 1000 grit to smooth it out and then shot with some primer. To be frank about it I was not happy with my results. I could see a lot of imperfections and decided this would be a good time to try high build primer.

High build primer goes on really thick but still shows quite a bit. After reading the forums and watching some videos I now know what people mean by a repetitive process of sanding and filing. I went out to an autoparts store and bought some Bondo spreaders and a few block sanders.. 80 & 320 grit. I then started the process of sanding off most of the primer and working with Micro mix and resin started to coat and fix the wing tip pieces.
 |
| Stripped back down |
I didn't take many more pictures of my work steps but over all wasn't that happy with the way the finished product turned out, especially when I cut and fit the lens. The lens weren't as flush as I wanted them to be and I may have been a little too rough on the sanding around the flanges, or the lens are just a bit off. My solution was to tape out the lenses to protect them and pretend I was icing a cake and get nutty on with it! Here's are some picture showing the before and then after I shaped it out.


Final Shaping is on the right
 |
| Final Lenses install |
Lessons learned through out this process is to be diligent in sanding, cleaning and waiting a good 18 hour or so before repeating the process. Shape everything with around 60 grit and then use high 150 or so grit to finalize the shape if you're concerned with over sanding. Once you think you're at a good place you can spray it with some water and check your work looking at the reflections. If it doesn't look consistent or you see rough spots then add more micro or sand some more.
Wing Tips
 |
| Section 24 |
I found trimming of this piece rather confusing and had to look at a lot of other build logs to get it figured out. At one point I over trimmed and used some of my new fiberglass skills to recreate another flange. I also reinforced parts of the inside that I felt were a bit too thin. Even some of the area's on the backside of the flanges that chipped away during the drilling and countersinking for the nut plates.
On item you should install now if you're going to do it is are wing tip antennas. These eliminate the need for the 'whisker' type antennas that typically are on top of the horizontal stabilizer. You can also install one in each tip if you're planning on dual NAV radios. I have dual Nav radios in my current plane and the only time I use this is for the monthly VOR checks and I may have used them during my instrument training. As a practical method though I navigate via GPS and don't see a reason for dual radios with the amount of glass I'm putting in this plane. These seem fairly simple and I know some guys have made their own, but that wasn't something I wanted to take on so I bought one of Bob Archers designs.
 |
| Bob Archer Wing Tip Antenna |
The installation on these is fairly straight forward. They suggest you move it as far forward as possible while still remaining as flat as possible. Given the build up with the new Light tip I moved it back just a little bit. After all was said and done I glassed it into the tip permanently.


Finishing up the wing tip I tried to put a few layups over the bracket rivets and fixed any dings and dents that occurred through out the above process. I decided my layups over the bracket looked like junk and I pretty much sanded those back off and ended up just skim coating and painting over it. The rest was a few days of working the final sanding, skim coats and primer to get it looking as best as possible. Ultimately when the plane gets professionally painted this will be redone anyhow.
The fit of the wingtip seems symmetrical to both sides. I've read about people having a heavy wing and ending up cutting the back of the tip and adjusting it to accommodate a new angle. I hope to not have this issue but won't know until flight. Everything looks to line up so that's a plus!

 |
| Pretty Wings |


