
 |
| Section 39 |
 If you're watching the time stamps of my build log post it may look like I just rocked through this section in a day or so... that's not really the case though. What happens is I become rather adept at multitasking and I might work on two or three sections at once. There are sections in the build that have little to no dependencies on one another for example fabricating parts or working on both the wings and the fuselage. Case in point I was working sections 37, 38 and 39 at the same time. So in sense I did complete 3 sections around the same time but it took me a good month or so to do it.
A downside to this process is I tend not to take a lot of pictures or a picture of random parts at random stages. For example below are some primed control rods, idler arm assembly and some other various things.
After the above parts dried for a week or so I riveted the elevator push-rods in the same manner as I had done for both the wings and the empennage. The only issue is it seems no matter what I do in terms of tracking the parts and their orientation I always have to do a bit of reeming before I can rivet it all back together. I don't know if it's the primer or maybe after deburing something gets skewed but I have yet to have one go back together without a bit of post primer work. I don't actually know if these needed to be primed since they reside in the tunnel but the plans didn't use 'Prime if desired' verbiage and instead just said 'Prime'. It's not that big of a deal so I primed them up.
The Idler assembly was entirely build by my neighbor Jason. I showed him how to deburr, match drill and fabricate a part. Actually had to fabricate the spacer twice because I wasn't happy with my first one, it was a bit narrow. Decided not to prime this part since it's in the tunnel and will be easy to inspect and replace if some corrosion happens down the line. One problem with the part is it was extremely tight once installed between the brackets and was rubbing against the brackets.


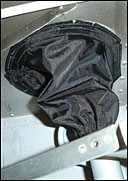
Had a bit of an issue with the brass bushings and control stick bases. The plans state you have to grind down the parts to get them to fit. Took a bit of time to get them to size and clean up the parts before I could get them to fit. Drilling and attaching the sticks was fairly straight forward. After that you just get the spacing correct and hook the rest of the parts together. I didn't permanently attach the rods that go outside the fuselage. I'm going to get some Aileron control rod boots which will limit the airflow from the wing roots into and out of the cabin.


 |
| Guide is the thin metal piece above the control rod in this picture |
The picture doesn't portray the excitement of having this section done. Assuming the wings and the tail-parts were attached you could essentially operate the control surfaces. Without those on you can still move the sticks around and see everything move which is almost as neat.

No comments:
Post a Comment
Note: Only a member of this blog may post a comment.