Thursday, November 5, 2015

Elevators "Mostly" Complete & Rudder Revist

Elevators

I was concerned on my hours vs. other builder logs.  It seemed I was almost done with the elevator in about half the time some other logs had accounted for.  The conclusion I came up with was either I'm a prodigy plane builder... or I was doing something wrong.    Well I'm happy to say neither was the case, although it would be nice to be a natural at building aircraft.  Really what it came down to is I completely underestimated that time it would take to complete the additional tasks.  Mentally you think you're going to fly through things, but then you spend hours and hours rolling the leading edge or riveting the trailing edge.  There's also a period where you use sealant and you have to wait days before you can continue.  Now I do multitask, and I used that period to work on the trim tab, but then botched up folding the edge and had to order another skin... will type about that later.

Following where I left off, I fabricated... ie cut out the ribs using the provided foam material.  Using some spray adhesive that luckily my neighbor had I was able to knock this out in about an hour... this is an example of something I thought would take 5 mins.  After cutting them out I test fit everything together to make sure there wasn't an issue.  I might have had the measurements of the interior placement a little off because I'm guessing they were supposed to line up between rivet ends and that wasn't the case with mine. Gently forcing them back allowed the rivet to put an indention in the end of it, can't see that posing an issue with it in the future so just went with it. After that cleco'd it up to make sure no issues before I started mixing the sealant.


 I'm using little 1 oz sealant kits for both these ribs and the trim tab ribs. I figured that would be less messy in the long run and since I was going to use the 3M tape for the trailing edge I really didn't need that much.  It is messy, but with gloves it's manageable and I was able to apply a thin layer to the top, bottom and back of the rib pieces and place them in.  Added the tape to the trailing edge and cleco'd everything in place.


While waiting for that to dry I decided to do a few things to my garage.  One was to make the homemade brake that will be used to bend the trim tab skins.  I just used two 3' pieces of poplar and 4 hinges.  Left a small gap on the hinge side, not sure if that's a good or bad thing.  Saw a few examples where they were sandwiched together, and others where there was a gap.


Next, I took an angle iron that I had, rounded a few of the edges, countersunk some holes and screwed it to the bench.  This is completely removable but can be used as either a straight angle or as a long back-plate for riveting the trailing edges of the elevators.


Lastly, I reorganized my tools and made a small shelf.  I really didn't like storing my pneumatic tools on my movable bench so decided to hang them.  Likewise, I decided to hang my 3 10' hoses so they wouldn't just be a tangled mess under the workbench.  I also found I kept using the right bench corner as a shelving system so decided to correct that making a small 8" deep 40" wide MDF shelf that I can throw things on instead.


Finally, after the mandatory 3 days of curing was up I was ready to get to riveting the trailing edge.  I used the same method I had used on the rudder.  It's basically-
  1. Place rivets in hole, secure with tape.
  2. Flip piece over and back rivet 1 middlish rivet about halfway and then move out 7-8 rivets a repeat.
  3. Go back through and halfway back-rivet the rest of the rivets (This apparently secures the rivets and keeps the edge straight.
  4. Flip piece and using a mushroom head rivet each rivet the rest of the way down.  I moved from the middle to the edges.
  5. Check to make sure edge is straight...


This is actually straight, not sure my camera is...
At some point this week I had a few minutes to spar so used that time to cherry rivet the cover plates.  Fairly simple step and one which literally took 5 mins.


Then came the time to roll the leading edges.  Just like the rudder this was a huge pain and my hands still hurt from doing it.  This was a multi-day process not only because the time it took but the amount of times I came in to google how other people had done it.  I rolled the edges using a tool that I had bought.  It's not the easiest tool to use but there's a good tutorial on how to use it.

After forming the edges, I decided to go with the method of cleco'ing a PVC pipe to the edge piece and roll it in.  I used a 1 1/2 because I previously used a 1 1/4 and didn't like the results.  That said I didn't particularly like the results of the 1 1/2 either.  I spent a good bit of time using the hand seamer testing different angles and continually working the edge.


Even after all of this I cleco'd it together and noticed 'pillowing' between the rivets.  This was the same problem I had on the rudder and that was after spending a lot of time messing with that piece.  It seems to be a common problem that people have and the suggestion was either continue to work it until it was flat or add extra rivets...


Pillowing...
Luckily in my grand wisdom of working the rudder I knew this day would come.  The day that I would make the executive decision and add some extra rivets to correct this.  So I had already ordered an extra bag #1123, containing the additional rivets needed for this add on step.  Drilling the additional holes was easy;
  1. Mark the lateral line between the rivets.
  2. Mark a vertical line exactly in the middle of pre-punched rivets.
  3. Use a small bit 3/64 or so to predrill the hole.
  4. Use a 1/8 or #30 to right size the hole.
  5. Use a #30 reamer to clean the hole
  6. Use compressed air to clean out the hole and clear any bits of metal from between the pieces.
  7. Acetone as a final cleanup
  8. Rivet away!
The end result isn't perfect but is a lot cleaner looking and makes me feel better.


Time to put counter weights on.  I'm not sure why Vans couldn't make lead molds specific to this step  resulting in the shapes required. That said, the instructions are simple enough but cutting lead on a band saw is not fun.   What's equally not fun is trying to cut the ridge off of two pieces and then trying to grind them somewhat flat.  It puts little pieces of melted lead all over the place which you get to clean up later.  Used a scale to make sure like parts were somewhat the same weight...

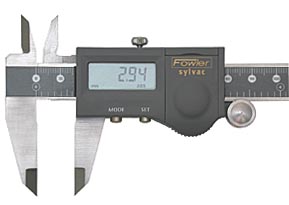
I did get to break out my new book and use my micrometer on this step.  The book has the measurements for all standard bolts and whatnot so I used that in conjunction with the micrometer to find the right bolts.  The washers and nuts were easy since they were in a bag by themselves.  After that it was just a matter of getting everything attached.  Using a mallet helped to gently hammer everything in place and get the bolts all the way through.  Then it was a matter of attaching everything and torquing to the correct torque.  Currently using a $10 harbor freight special torque wrench which I need to replace with a higher quality tool.  For this purpose it works fine but when I get to some more specific items will need to not only double check these but ensure all nits, fasteners etc are within their proper tolerances.


Complete minus trim tabs

Rudder Revisit

Since my original work through of the rudder I have become adept at a few things.  One of which is deburring the skins, so I decided to get the rudder down and give it a once over to ensure all the skins were deburred as best as possible.  I then decided to go ahead and fix my previous rolled edge by adding the additional rivets as I did on the elevators.  Again a few area's I could improve, but overall much better looking. 


Next up, trim tabs....

Tuesday, November 3, 2015

Quick-build Wings & Fuselag Kit Ordered

What is a Quick-build Kit?

In order to maintain the "51% Rule" no kit build aircraft can be sold to you by the manufacture completely assembled. They can however sell you major assemblies to eat into the 49% that doesn't have to be built by an amateur.  In the case of the RV-10 you have the option to purchase both the wings and the fuselage about 85% complete.  Here's an example of what an RV-7 Standard build looks like vs a Quick build.

Standard Build
Quick Build

Quick-build Kit Ordered

I decided before starting this project that if I could get halfway through the empennage project and still enjoying the building process then I would push forward with the rest of the project.  Prior to that point you could really just sell your tools and kit parts and maybe break close to even... minus your time.  Finishing up with the elevators and having the tail cone left I think that puts me about halfway through.  Also given that I'm going the quick-build route I need to place my order given the 4-6 month lead time on delivery of the crates.

There are pros and cons going either way but for me even before ordering the empennage kit I knew I was going the quick-build route.  It's a simple trade off of money vs time by going the QB route on both the wings and fuselage.  In my case I can easily justify spending an extra $15K in order to shave at least 1000 hours off the build time. The value added for me is also the assurance that it will be done professionally including all priming, tank sealing and any of the numerous challenges that arise on a build.

Sunday, November 1, 2015

Elevator Progress

Elevators

With the HS being complete I focused back to the elevators, running back through several steps to make sure I wasn't missing anything in repairing my previous mistake.   It didn't take long to re-rivet the piece back in.  I thought I would do more damage than good matching drilling the parts, so instead I used a reamer bit to get the holes to size prior to riveting.  Everything went fine, and I had no issues getting rivets to fit.


New part fits perfectly.

Riveting the skins up I used my method of taping first and working down the line with the rivet gun, looking in and checking as I did each one.  When I bought my tools I also purchased a special RV-10 empennage bucking bar as well. The choices are to buy it, make it yourself or use cherry rivets instead.  I will probably use this similar technique in the future, clamping down the part and using the workbench as leverage to rivet was painless.


As a reminder I cleco all the holes that I'm not to rivet yet.
Once I had the gusset riveted in I could close the inner skins up.  This went fairly quick with the squeezer.  When I got to the part where I was putting the outboard tips on riveting got a bit more challenging. Several times I dropped the bar and ended up with some warped skin sections.  I've learned that pre-paint these are 100% fixable assuming you're not punching holes in the skin so I'm not going to stress out about it.


Spent a good 30 mins or so working the band-saw and grinder to get the foam blocks into their proper shape.  Using spray adhesive to attach the template worked flawlessly and the paper was easy to peel off when done.  This was also the first time to use the Tank Sealant product.  This is used to attach the ribs into the scuffed sections inside the trailing edge.  This stuff seems a lot like JB weld, and being familiar with that used it as such.  Mixed it up applied to the ribs and slide them in place.  The plan also calls for using this sealant for the trailing edge piece, however per Vans I can still use the tape I used previously, decided to go with that.  Overall was all a bit messy, very important before cleoco'ing down and putting weights on that you verify ribs didn't move around.  Now I'll work on the trim tab this week while I give three days or so for sealant to cure.


Dry fit placement


Tuesday, October 27, 2015

Horizontal Stabilizer Completed

Over the weekend and into the week nights I made it a point to go out in the garage and work on the build even if I only had a few minutes.  The mundane actions of deburring, match drilling and dimpling really beat you down after some time.  Breaking it up into 30 mins here or there is almost like sprinting... force yourself to go a little bit more and then stop... recover and go again. I didn't take pictures of the match drilling part because it's really not that exciting, but it has to be done so that's what I did.  After that disassembled the HS and laid all the parts out ensuring they were properly labeled and clear of any sharp edges.


Dimpling the substructure pieces is easy.  My youngest daughter even made a comment about how fast I was at it now.  I just use the pneumatic squeezer, place it on my thigh and just run the part through it.  I have to at times make myself slow down, so I don't end up accidentally putting unneeded holes into the pieces.   Same with the skins, just use the squeezer on all the edges you can get to and the Cframe and table for the rest.   I got bored extremely fast on the Cframe, it may have taken 2 hours to dimple the skins but that was broken out into an entire day... I would go hit it for 20 mins and then go do something else.  I did feel I improved my technique... I used to double tap with a mallet but now I just do a single strike.  That seems to work as well and in the off chance it pops out of the hole I don't end up hitting it again and making a dimple or hole where it doesn't need to be.

For where the nose ribs go you can't bend the skin enough to use the Cframe, nor can you use the squeezer.  Instead you use a cherry 'pop' rivet gun and a close quarters dimple set.  I've read someone used this on their entire RV build... that would add hundreds of hours to an RV-10 build.

Dimple die set
Ensure dimple side is where you want it.
Apply enough pressure to squeeze set together, too much you're break it.
Finished dimple

After all dimples were complete I was ready to get to priming.  Given the amount of substructure pieces and the importance of position I labeled all pieces to include the spars to increase my chances of getting it put back together correctly.  During the process of cleaning with PreKote all the ink goes away so my method was to line the pieces up in order and flip them once clean so when they were dry I could relabel.

Another note is you have to countersink about 300 holes on the spars after they've already been primed once.  I decided to reprime the flanges after countersinking and cleaning the holes.


After 24 hours I was ready to start putting the stringer assembly together with rivets and then start cleco'ing up the Horizontal Stabilizer together.  A little time saver tip is you don't need to cleco every single hole.  Space them out by about 3 or 4 and then all cross-section pieces and if there are some holes that don't line up then you can put them in every hole in that area.


Surprisingly I was able to knock out all the skin riveting and finally assembly in one long evening.  It takes a lot of time to rivet.  Things that slow you down are when you mess up a rivet and have to drill it out.  Or just taking the time to get the bucking bar in place and then focusing on using the gun.  I'm not sure how I feel about some of my riveting.  For example, some of the nose ribs seems to have a bit of an indention to it.  From videos I've seen and people I've talked to this is normal... not every rivet you drive is going to be 'perfect'.  All the scuffs, scratches, dents and dings as long as they're not major can get fixed prior to paint.  I assume it's akin to using Bondo as a filler on a car, not really sure how that will work with rivets though...  Guess I'll figure that out later.


As a perfectionist this bothers me....
Another possible time saver is I watched a video of a guy doing the HS skin and it looked like he did every rivet one at a time.  Place the rivet in, get the bar set and rivet... rinse repeat.  I did this for about 5 rivets and figured the tape method would work better.  So that's what I did, laid the HS... well horizontal and placed the row of rivets in where I wanted to lay them.  Using clecos in specific places helped keep everything together.  The rest was a matter of starting on the inner section and moving outward.  That kept everything in place, similar to placing a cleco right next to the hole you're riveting. Took a bit of set up time to do this but once I was ready to drive the rivets I put the HS back up vertically and just moved down the line, bucking bar in one hand, rivet gun in the other.  Even with having to drill out about 5 rivets it still took me maybe 3 hours max for the inside rivets.

Taped rivets over forward spar
With the end in sight I pushed on to do the rest of the riveting.  The last set of 200 or so rivets can be done with the squeezer.  Was able to just lay them all out and just roll through them along with the web cherry rivets and thus completing the HS stabilizer.

I look rough after hours of riveting!
Speaking of cleaning my garage/workshop was bothering me the last couple days with partially completed pieces, drying pieces and in general a mess to look at and work in.  So, I took a few minutes to get everything organized and ready to jump back to the elevator.