Elevators
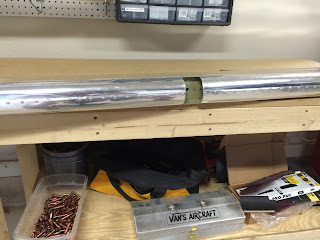
I was concerned on my hours vs. other builder logs. It seemed I was almost done with the elevator in about half the time some other logs had accounted for. The conclusion I came up with was either I'm a prodigy plane builder... or I was doing something wrong. Well I'm happy to say neither was the case, although it would be nice to be a natural at building aircraft. Really what it came down to is I completely underestimated that time it would take to complete the additional tasks. Mentally you think you're going to fly through things, but then you spend hours and hours rolling the leading edge or riveting the trailing edge. There's also a period where you use sealant and you have to wait days before you can continue. Now I do multitask, and I used that period to work on the trim tab, but then botched up folding the edge and had to order another skin... will type about that later.Following where I left off, I fabricated... ie cut out the ribs using the provided foam material. Using some spray adhesive that luckily my neighbor had I was able to knock this out in about an hour... this is an example of something I thought would take 5 mins. After cutting them out I test fit everything together to make sure there wasn't an issue. I might have had the measurements of the interior placement a little off because I'm guessing they were supposed to line up between rivet ends and that wasn't the case with mine. Gently forcing them back allowed the rivet to put an indention in the end of it, can't see that posing an issue with it in the future so just went with it. After that cleco'd it up to make sure no issues before I started mixing the sealant.
 |
While waiting for that to dry I decided to do a few things to my garage. One was to make the homemade brake that will be used to bend the trim tab skins. I just used two 3' pieces of poplar and 4 hinges. Left a small gap on the hinge side, not sure if that's a good or bad thing. Saw a few examples where they were sandwiched together, and others where there was a gap.
Next, I took an angle iron that I had, rounded a few of the edges, countersunk some holes and screwed it to the bench. This is completely removable but can be used as either a straight angle or as a long back-plate for riveting the trailing edges of the elevators.
Lastly, I reorganized my tools and made a small shelf. I really didn't like storing my pneumatic tools on my movable bench so decided to hang them. Likewise, I decided to hang my 3 10' hoses so they wouldn't just be a tangled mess under the workbench. I also found I kept using the right bench corner as a shelving system so decided to correct that making a small 8" deep 40" wide MDF shelf that I can throw things on instead.
Finally, after the mandatory 3 days of curing was up I was ready to get to riveting the trailing edge. I used the same method I had used on the rudder. It's basically-
- Place rivets in hole, secure with tape.
- Flip piece over and back rivet 1 middlish rivet about halfway and then move out 7-8 rivets a repeat.
- Go back through and halfway back-rivet the rest of the rivets (This apparently secures the rivets and keeps the edge straight.
- Flip piece and using a mushroom head rivet each rivet the rest of the way down. I moved from the middle to the edges.
- Check to make sure edge is straight...
 |
| This is actually straight, not sure my camera is... |
At some point this week I had a few minutes to spar so used that time to cherry rivet the cover plates. Fairly simple step and one which literally took 5 mins.
Then came the time to roll the leading edges. Just like the rudder this was a huge pain and my hands still hurt from doing it. This was a multi-day process not only because the time it took but the amount of times I came in to google how other people had done it. I rolled the edges using a tool that I had bought. It's not the easiest tool to use but there's a good tutorial on how to use it.
After forming the edges, I decided to go with the method of cleco'ing a PVC pipe to the edge piece and roll it in. I used a 1 1/2 because I previously used a 1 1/4 and didn't like the results. That said I didn't particularly like the results of the 1 1/2 either. I spent a good bit of time using the hand seamer testing different angles and continually working the edge.
Even after all of this I cleco'd it together and noticed 'pillowing' between the rivets. This was the same problem I had on the rudder and that was after spending a lot of time messing with that piece. It seems to be a common problem that people have and the suggestion was either continue to work it until it was flat or add extra rivets...
 |
| Pillowing... |
- Mark the lateral line between the rivets.
- Mark a vertical line exactly in the middle of pre-punched rivets.
- Use a small bit 3/64 or so to predrill the hole.
- Use a 1/8 or #30 to right size the hole.
- Use a #30 reamer to clean the hole
- Use compressed air to clean out the hole and clear any bits of metal from between the pieces.
- Acetone as a final cleanup
- Rivet away!
The end result isn't perfect but is a lot cleaner looking and makes me feel better.
I did get to break out my new book and use my micrometer on this step. The book has the measurements for all standard bolts and whatnot so I used that in conjunction with the micrometer to find the right bolts. The washers and nuts were easy since they were in a bag by themselves. After that it was just a matter of getting everything attached. Using a mallet helped to gently hammer everything in place and get the bolts all the way through. Then it was a matter of attaching everything and torquing to the correct torque. Currently using a $10 harbor freight special torque wrench which I need to replace with a higher quality tool. For this purpose it works fine but when I get to some more specific items will need to not only double check these but ensure all nits, fasteners etc are within their proper tolerances.
 |
| Complete minus trim tabs |
Rudder Revisit
Since my original work through of the rudder I have become adept at a few things. One of which is deburring the skins, so I decided to get the rudder down and give it a once over to ensure all the skins were deburred as best as possible. I then decided to go ahead and fix my previous rolled edge by adding the additional rivets as I did on the elevators. Again a few area's I could improve, but overall much better looking.
Next up, trim tabs....


No comments:
Post a Comment
Note: Only a member of this blog may post a comment.