
Sub-assembly Riveting
Had another warm day this week so was able to go out and prime the skins pieces. That leaves me with probably just enough AKZO to prime my replacement longerons and brackets. I also used another 2 cans of paint so went ahead and ordered another case (6). Since I knew I was tight on paint I wasn't able to paint the top skins, which is fine I can do those later and will just need to rough up the AKZO a bit to ensure adhesion.In between the priming and paint curing I started riveting the sub assembly pieces. I had missed previously where I was supposed to countersink some holes on the bell crank assembly. Wasn't a big deal, just went ahead and made my countersinks and then repainted over the holes prior to riveting.


The next part is just a matter of riveting up some of the bulkhead parts, attachments and ribs. Was able to use the pneumatic squeezer for a majority of the rivets which made it easy and uniform.


To reassemble you just follow the process like before, the only tricky part is getting the back bulkheads and tie down skin back in. The below picture is before that step.

Gap Fix
Because on my previous foul up with the longerons I needed to remake the F-1010A horizontal stabilizer attachment angle. When match drilling back onto the F-1010 bulkhead my clamps didn't hold tight enough, and the middle hole was a bit lower than I wanted. I didn't know how much of an issue this would cause so I went ahead and match drilled the rest with a solution in mind if it was too low.After clamping the new longeron pieces in place there was a substantial gap between the bracket and where the longerons needed to sit.


I tried to fabricate a part out of the 'Empennage Trim Kit' pieces provided by Vans. They're pretty thin so it wasn't as snug as I wanted. So instead I drew out the size of piece I needed on some scrap ie previously messed up parts. Cut this out and worked on the sizing to get it to be as tight as possible so once bolted/riveted it won't move. After putting the spacer (Also remade) on top I was extremely happy with the results.


 |
| No Gap! |
Longeron Redrill
Ever since I botched up my old longerons I was logistically trying to mentally work out the fix. On one hand you don't want to enlarge the pre-punched holes and on the other you don't want to throw off the alignment with the new parts. The plans call for drilling with a 3/32, cleco'ing the bottom skin, then when you get the top skin on match drill with the #40. This insures it's a tight fit. However after talking to Vans they just suggested I do it this time with the #40. I assume this reduces the risk of messing up the pre-punched holes.I hate to say it but my new longerons are a better fit than my first ones. Cleco'ing everything up I tested the alignment of the tail... it was 2 10ths of a degree off.... but so is my floor so I'm calling it level.


Because of the amount of material you're removing from the longerons there's a concern with metal shavings. First go through it's a non issue because you take everything apart again. This go around I'm not so my solution was to tape some packing paper in the middle to catch the shavings and prevent them from getting stuck.
Now after drilling I removed the longerons to deburr and ran an old t-shirt on the skins and visually inspected each side. This also knocked more material onto the paper which was easily removed and discarded. There was one spot in the back I didn't cover well enough but was able to uncleco and work the shavings out with the t-shirt and air compressor.
 |
| Ready for Surgery |
 |
| Redrilled, Deburred, Cleaned and Back together... success! |
 |
| With the Aft Deck cleco'd on. |
My plan is to get a majority of the structure riveted up before placing the top skins on and redrilling the deck. Since this is were I fouled up before I want to take my time to ensure no mistakes this go around. I'm also waiting on the bracket piece I ordered, said shipped on the 10th but no status update so guessing it hasn't shipped. Will probably just order the aluminium and make it myself again... but this time correctly.
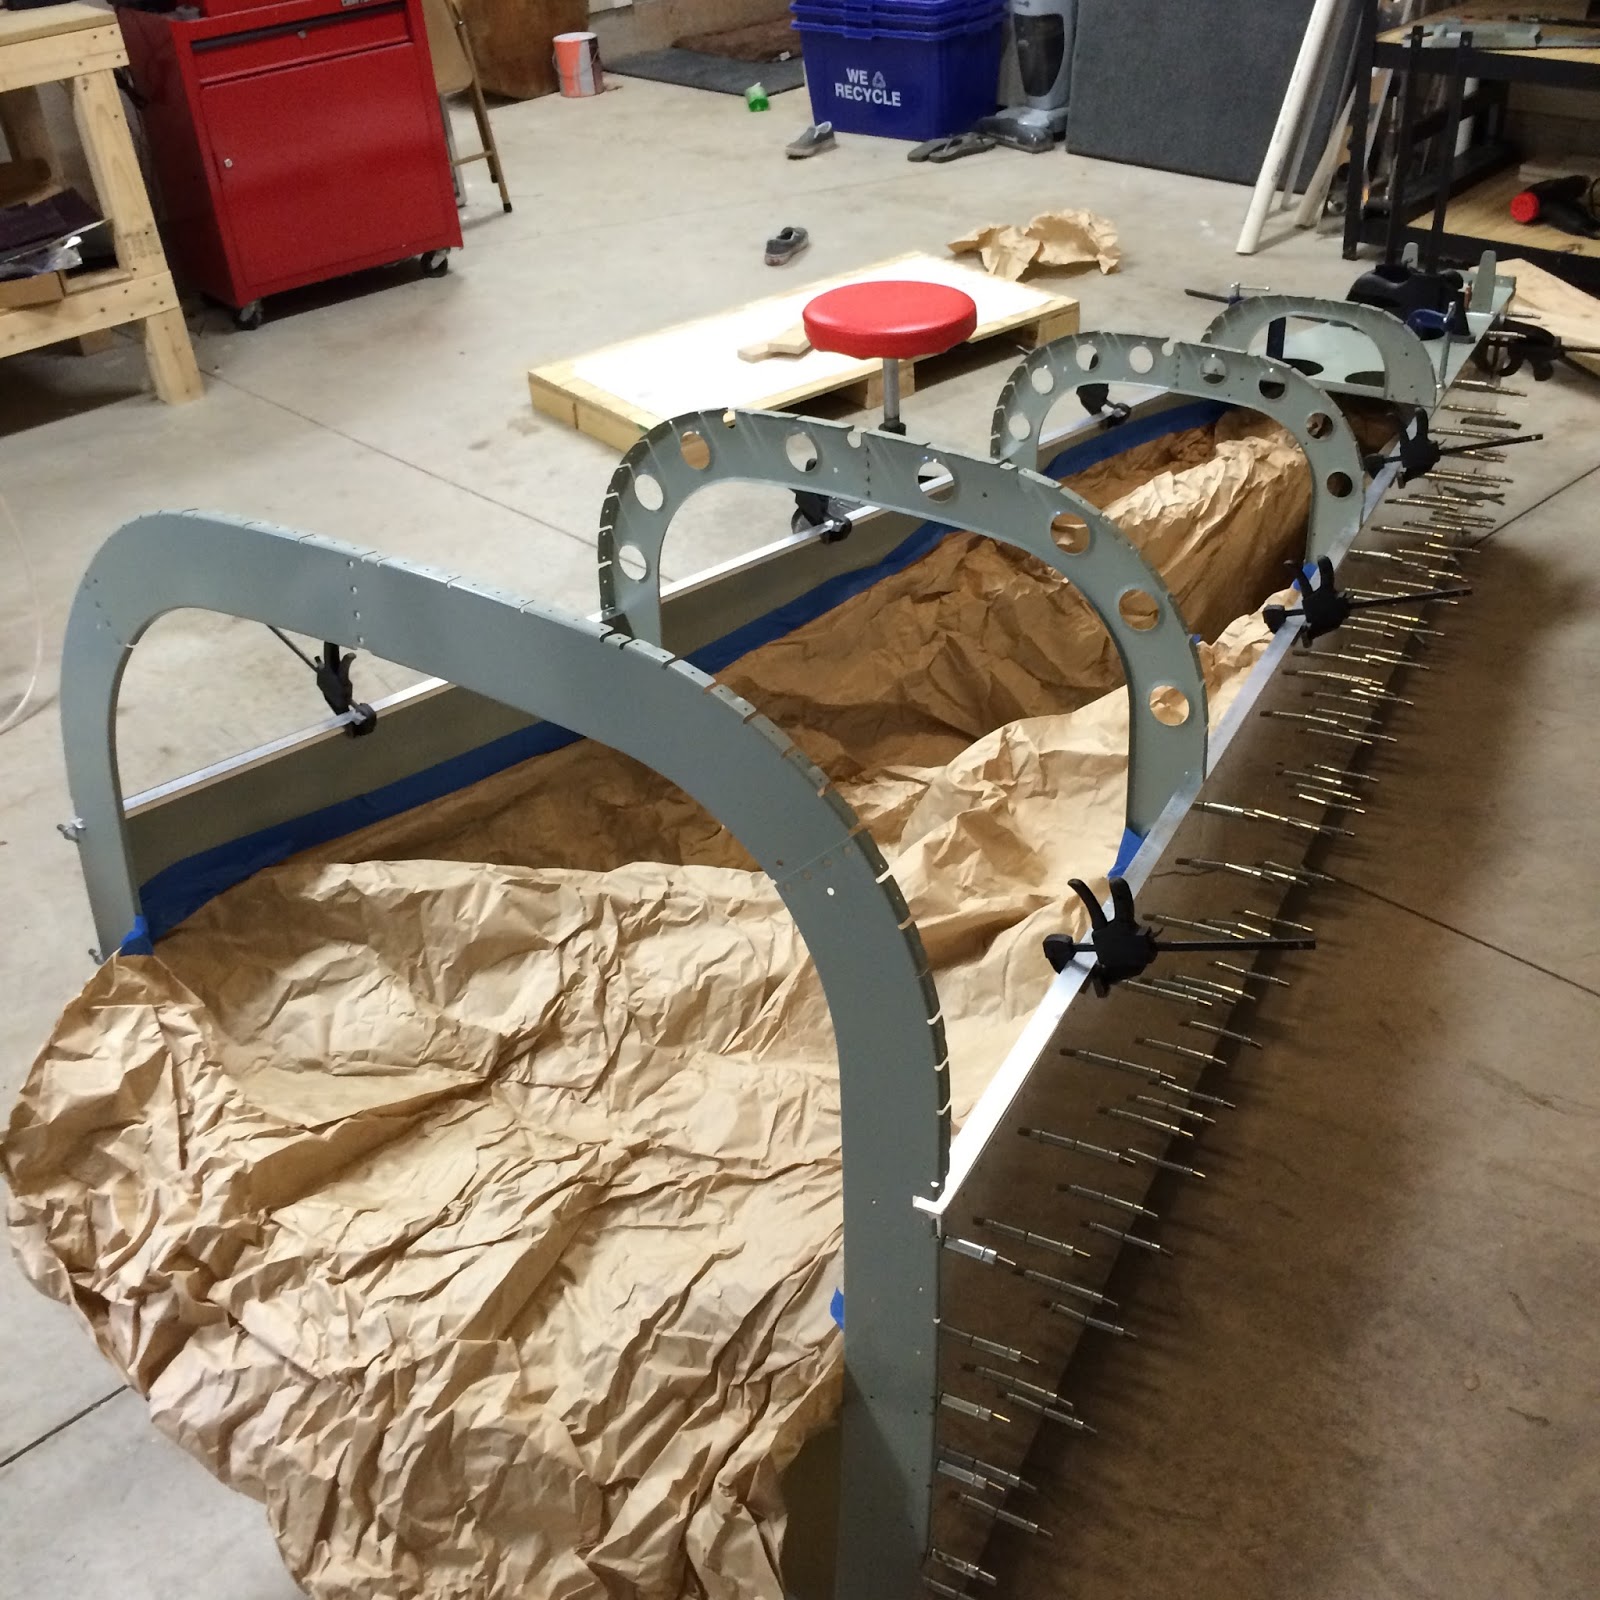
Tailcone Riveting
Now starts the long process of riveting the stiffeners and bulkheads to the skins, in turn completing this major section. This is the first time in the build that it's truly a two person job. I've seen where people have riveted the bottom by removing a side, then riveting the two sides but my concern is alignment so would rather rivet it while it's all assembled.
My approach is similar to what others have done and that's to back rivet the entire thing. Back-riveting ensures you're pushing the parts stiffeners and flanges in when riveting, also gives a much cleaner look on the outside. The downside is it's a bit of a process to do this and defiantly requires two people to move this piece around.
Experimenting with different processes I was able to get one full stiffener riveted and part of another. The rivets look great but it's going to be very time consuming. I've read people spend 15 hours or more just on this step and can completely understand that. My way forward on the bottom skin is to put each cleco in from the inside out, tape a line of rivets and then move the bucking plate along the bottom doing 6 or so rivets at a time. The second person is required to help not only move this piece around but angle it during back riveting to ensure it's flat against the plate. This is going to be especially crucial on the curves of the flanges.

No comments:
Post a Comment
Note: Only a member of this blog may post a comment.